SOWING SEASON

It’s been a busy couple of weeks trying to get together all the seeds that we have planned out for the plots alongside germinating them all and keeping to our schedule to ensure that we don’t miss out on getting them in the ground in time.

Covid 19 has been a slight restriction in terms of tending to the plots and we have also noticed that we haven’t got all the seeds that we originally had planned for so we have made some adjustments and added some new fellows to the mix.

Alexandra [Ben’s other half] has been known as ‘Mother Seed’ the last few weeks as she has been talking and tending to the seedlings preparing them for the plots. As has Natasha and our niece Xia – every morning Xia will tend to her ‘planty, planty’s’; talking and watering them [she’s only 2 – setting up the future generations – ha!].

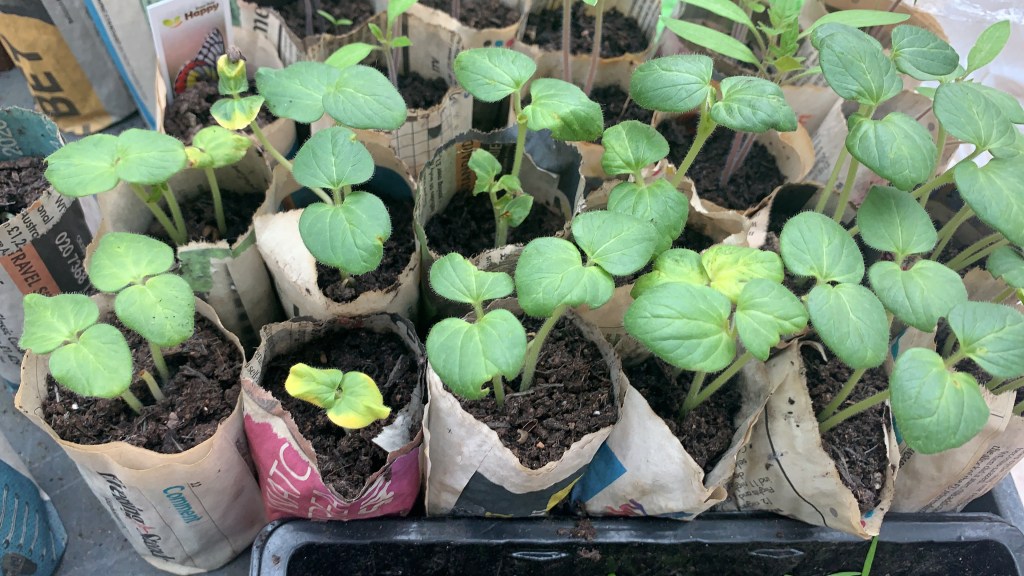
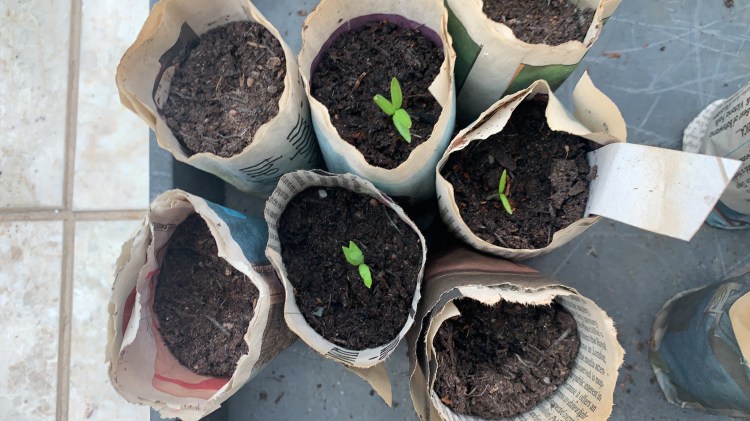
We have found that newspaper pots have been pretty useful and we will be able to plant the seedlings straight into the ground [or bigger pots] when they are ready to go outside.

They are really easy to make – we did the rolling method [aka the lazy method] but here is a great video on origami pots where you fold the paper [https://www.mnn.com/your-home/organic-farming-gardening/blogs/newspaper-seed-starter-pots%5D.

So far we have planted; tomatoes, onions, broccoli, okra, potatoes, lettuce, beans, butternut squash, pumpkin, mustard, spinach, oca, beetroot, carrots, peas, aubergine, asparagus, strawberries and numerous herbs [that list was reeled off from memory so I may be missing some – forgive me!].

We would love to know what you have planted this year?

Okra Plants – 3 weeks old

Gardening Tools – For Beginners

So, although the name of this blog is ‘The Diary of a New Gardener’, we have collectively 66 years of growing experience [a bit crazy to say, but as we started growing things at the young ages of 5,7 and 9 we all have 22 years of experience each – therefore collectively 66] but we are no professionals…we have always gardened for leisure purpose and learnt through trial and error – always valuable!


We will never stop learning, the seasons will continuously change, along with a good / bad crop. We have seen and learnt a lot but there is always a new plant to try and grow, a different climate to possibly explore [dreaming of that farm in South America]. Throughout the years of growing things, we have always tended to grow things more in the usual safer realm of tomatoes / herbs / potatoes / carrots etc.


We have tried to grow things a little more explorative i.e. moringa [didn’t even sprout], we hope that we can try and grow things that we have never grown below, given the UK climate, we are somewhat restricted, although we do have a large conservatory that we try and cultivate some more ‘exotic’ plants.


Our area in Kent where we have our garden [and now an experimental allotment] the ground has a very high percentage of clay so we have to spend time treating the soil to try and make is ‘plant friendly’ as possible. We are currently doing this at the allotment and will speak about clay in another post.


So, below we have listed the tools we continuously bring out year on year. They are staples in our shed and we have only ever replaced the occasional trowel [after getting either lost or broken] but other than that, you buy the tools once, they are with you for a lifetime [sustainable joy];


1 – Our hands – probably one of the key elements to gardening – don’t undermine the effectiveness of the hand.

2 – A spade – especially useful for turning over larger surface areas of soil [without using a rotavator]

3 – A trowl

4 – A fork

5 – Gardening gloves

6 – A wheelbarrow

7 – A rake

You really don’t need a lot of tools when you garden – unless you have acres and acres of land and require machines to assist with the graft.


We try and use out hands as much as possible- feel the earth people – its good for the skin!

We will create a near future post with a list of our recommended [and personally used] top gardening tools for you to take a look at [or look for a new spade].


We hope this list will of use – if in doubt use one of the best tools we were given – our hands – they never let us down!

To dig, to double dig or to not dig at all! – Improving your Soil.

Turning the soil (single dig method):
As my plot was covered in browning weeds after the spraying of weed killer I decided on a labour intensive strategy (but in my mind a key one) which was to remove the largest clumps of weeds and to dig the majority of the plot. I also had a Mares Tail issue so I had to comb out the black roots as I turned.


The easiest method to dig and turn over the soil manually is to dig a trench along one side of the plot. Start by digging a trench at least a spade wide and as deep as you can or at least a spade deep.


Keep the soil you have excavated in a wheelbarrow or move it up to the opposite end [the finish line] of the area you will be digging.
After which, stand facing the trench, take half a step back and dig down, turning the soil into the trench. Continue moving horizontally down the trench throwing the soil into the trench space until you have reached end. Move back a half a step and repeat the process moving yourself back along the trench the opposite way.
Eventually you will reach your initial removed soil from your first trench/the finish line and the whole area would have been turned. This is single digging and the hardest part will be the initial trench dig!
Double Digging:
To double dig an area, it is very similar to the above process. I found the only real difference is that you need to start with a larger initial trench.
After you have dug your trench, use a fork to dig down a further fork depth. Then when you are turning over, again turn your soil over and then go down another spade depth or fork depth to break up the sub-soil.
This is why this process is called “double digging”. It is about as labour intensive as the usual digging method but takes a fraction longer. It is mainly used when you have a really compact sub-level.
No-Dig:To implement a no-dig method into your garden/plot is a fairly simple process. You need to lay down a layer of cardboard (try to find the corrugated version – tear each sheet in half so that the corrugated sides are exposed). Then you cover the cardboard in the good stuff…compost.
To plant in a “no-dig” you just make small holes in the soil and try to disturb the sub-layers as little as possible.
You can also use a Lasagne method to cover your cardboard (which is cheaper than using the compost). Cover the cardboard in layers of green material, brown, minerals and compost and water well. This will naturally rot down over time and become a very good growing medium.
For my plot, I have a number of different areas where I will be trying different types of Dig, double dig and no-dig methods to see the differences.
Here is a list of the positives and negatives of each different method, I have experienced so far:

Single Dig:
Positives

  • Quick (once started)
  • No specialised soil or equipment (other than a spade)
  • Low costs for immediate result
  • Incorporates green organic material into the soil

Negatives

  • Disturbs soil ecosystem
  • Doesn’t touch the sub-soil
  • Doesn’t help with levelling
  • Leaves large clumps in clay soils which need breaking up

Double Dig:
Positives

  • Assists with drainage into sub-soil
  • Aerates the soil deep to allow roots to find new minerals
  • Not much more effort than single digging
  • Incorporates green organic material into the soil

Negatives

  • Greatly Disturbs soil ecosystem
  • Churns dormant weed seeds in the soil to the surface which causes a lot of weed sprouting a week later
  • Doesn’t help with levelling an area
  • Leaves large clumps in clay soils which need breaking up

No Dig (cardboard & compost)**:
Positives

  • Keeps the soil ecosystem and doesn’t disturb
  • Plants grow into the new material on top and cardboard helps keep weeds down
  • Easiest and lowest manual labour of all methods
  • Quickest to set up, (if you’ve got the materials/budget)

Negatives

  • Very large requirement for Compost/cardboard
  • Does not allow removal of perennial weeds with large roots like Mares Tail, so greater need to weed in the beginning to reduce these root weed strength.
  • Doesn’t amend existing soil (should you have drainage issues etc)
  • Some cardboards contain glues that you may not wish to introduce into your garden

**I have yet to try to No-dig method with layering green materials and compost, I can imagine it will have similar positives and negatives to the above.**


Whilst using both digging methods, it is a good time to include organic matter (if you have some to hand). If you are introducing more materials whilst digging, again make a larger starting trench as you will be introducing more material as you go. The top soil should form around 6 to 8 inches deep and this contains most of the organic material.


For my plot, I initially used a double dig method – left the soil for a few weeks to allow the weather to work its magic on the large clay lumps and turned about 3 times with single digging to open up the clay soil and allow oxygen into the soil. As more air is allowed into, the soil and vegetation turned in starts to compost very quickly. Before planting in spring I will likely turn the soil one more time introducing fresh compost, which will assist the plants in the growing season. This year [after the first full harvest], I may turn to using some cover crops in areas – I will write about this in the Cover Cropping later in the year.


For an area using a no-dig method, keeping on top of weeding is a priority. You can use cut and drop methods (pull the weeds gently and simply drop these on the surface). By doing this regularly you reduce the energy in any roots by constantly stopping new growth, eventually the roots should run out of energy and start to compost themselves. Another good layering of composting will assist before planting. There is no need to turn this into the soil, simply keep adding compost to the area over time.