We are all told, “live your life to the fullest”; we are here to do just that.
We are three siblings, with a passion for living as naturally and as sustainably as possible.
The Diary of a New Gardener [DOANG] serves as a vessel for you to follow our journey into building a more sustainable life, project our passions, alternative views and clue in our loyal readers as to what inspires us in this amazing world.
It’s been a long time since we last shared a post…But we’re back, ready to inspire, teach, and most importantly, have fun in the garden again. Whether you’re a seasoned grower or just starting out, we’re here to share our journey—full of successes, mishaps, and plenty of humour along the way. So grab your trowel, dust off those seed packets, and let’s get growing together!
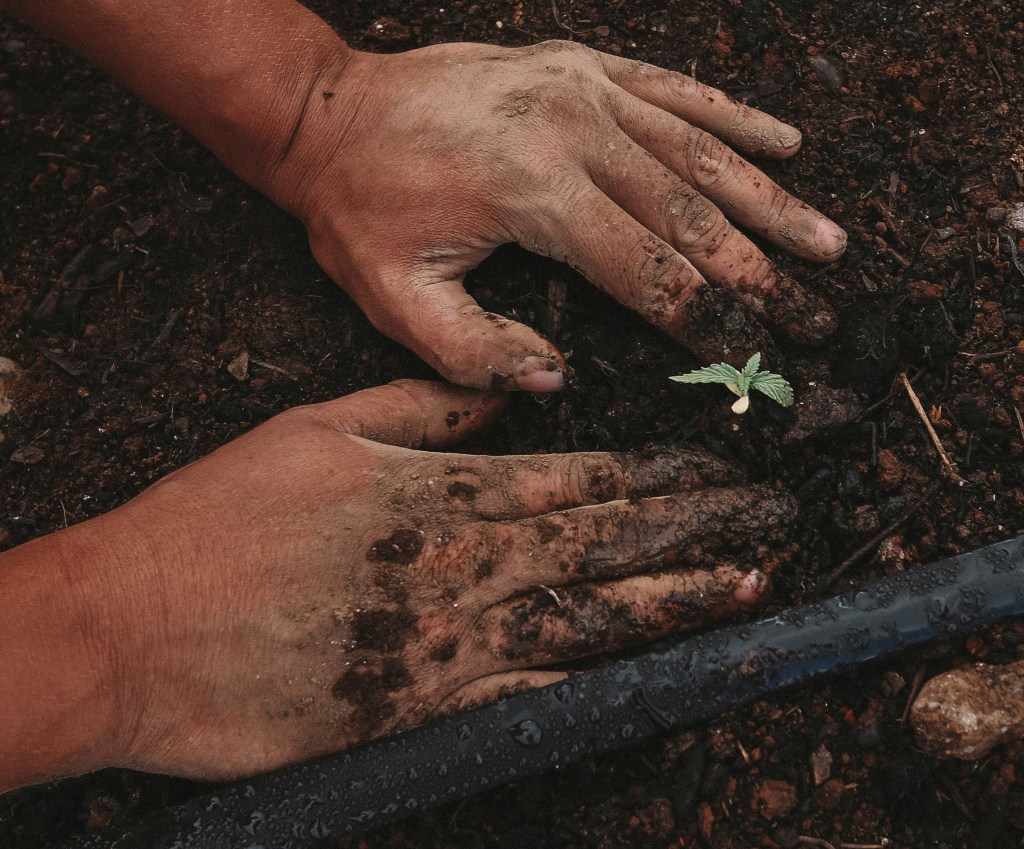
As the days begin to lengthen and the soil starts to warm here in the UK, we’re back with a guide to getting started with growing your own food. Whether you have a small garden, an allotment, or just a few pots on a patio, now is the perfect time to sow the seeds of self-sufficiency. Growing your own produce not only saves money but also brings a sense of satisfaction (and tastier veg!) to your table.
What to Sow This Month – A Beginner’s Guide
If you’re just starting out, don’t worry! Some crops are forgiving and easy to grow, giving you a great harvest with minimal effort. Here’s what you can start sowing right now:
These are quick to germinate and can be grown in pots, raised beds, or straight into the soil. Keep them well-watered, and they’ll reward you with fresh leaves in just a few weeks.
Coriander (great for fresh leaves and seeds later in the year) Buy coriander seeds or Real Seeds Coriander(You can also find whole coriander seeds in the spice racks at supermarkets! These are usually viable and will germinate well. Simply soak them overnight and plant them as you would normal coriander seeds. This is a cheap and easy way to grow fresh coriander!)
Herbs are a must for any small-scale grower – they add instant flavour to your cooking and thrive in pots. Keep them near the kitchen door for easy access!
How Much Could You Save?
Growing your own produce can lead to significant savings compared to buying from supermarkets like Tesco. For example:
A bag of mixed salad leaves costs around £1.50, but growing your own lettuce from a packet of seeds costing £2 can provide fresh leaves for months.
A bundle of fresh herbs costs about £1 per packet, whereas a single pot of parsley or coriander grown at home can keep producing for an entire season.
A 1kg bag of carrots costs roughly 80p, but a £1.50 packet of seeds can yield several kilos throughout the growing season.
With a small investment in seeds and a bit of care, you could save £10-£20 per month on fresh vegetables alone – and the savings only increase if you preserve surplus produce or swap with friends and family.
A Few Tips for Success
Don’t overcomplicate things – Start small and grow what you’ll actually eat.
Use what you have – No need for fancy equipment; old containers, yogurt pots, and window sills work just fine!
Keep an eye on the weather – A sudden cold snap can damage young seedlings, so be ready to protect them if needed.
Share the surplus – If you end up with more than you can eat, swap with neighbours or donate to a local food bank.
Time to Get Growing!
This is the month to take the first step towards growing your own food, whether it’s a single pot of herbs or a full vegetable patch. There’s something incredibly satisfying about eating what you’ve grown yourself – and even better when you can share it with friends and family.
What are you sowing this month? Let us know in the comments – we’d love to hear how your garden is growing!
‘The world generates 2.01 billion tonnes of municipal solid waste annually, with at least 33 percent of that—extremely conservatively—not managed in an environmentally safe manner.’
Worldwide, waste generated per person per day averages 0.74 kilogram but ranges widely, from 0.11 to 4.54 kilograms. Though they only account for 16 percent of the world’s population, high-income countries generate about 34 percent, or 683 million tonnes, of the world’s waste.
When looking forward, global waste is expected to grow to 3.40 billion tonnes by 2050, more than double population growth over the same period.
Its so important that we are able to re-use and upcycle the things that already exist – as the saying goes:
“One man’s trash is another man’s treasure”
We have complied a beginners list of useful places/ people you can contact (hopefully wherever you are in the world) to find free things to use in your upcycling projects – whether they be in the garden, home or to make gifts for family and friends. Hope they come in useful.
Local tree cutters for chippings and wood (they always want to get rid of their chippings and are usually happy to give them away for free
Builders merchants / companies– usually have some old scraps lying around that they will allow you to take for free
Neighbours– if you have a neighbour carrying out renovation work – they may have a skip full of goodies you could use for a possible up-cycling project.
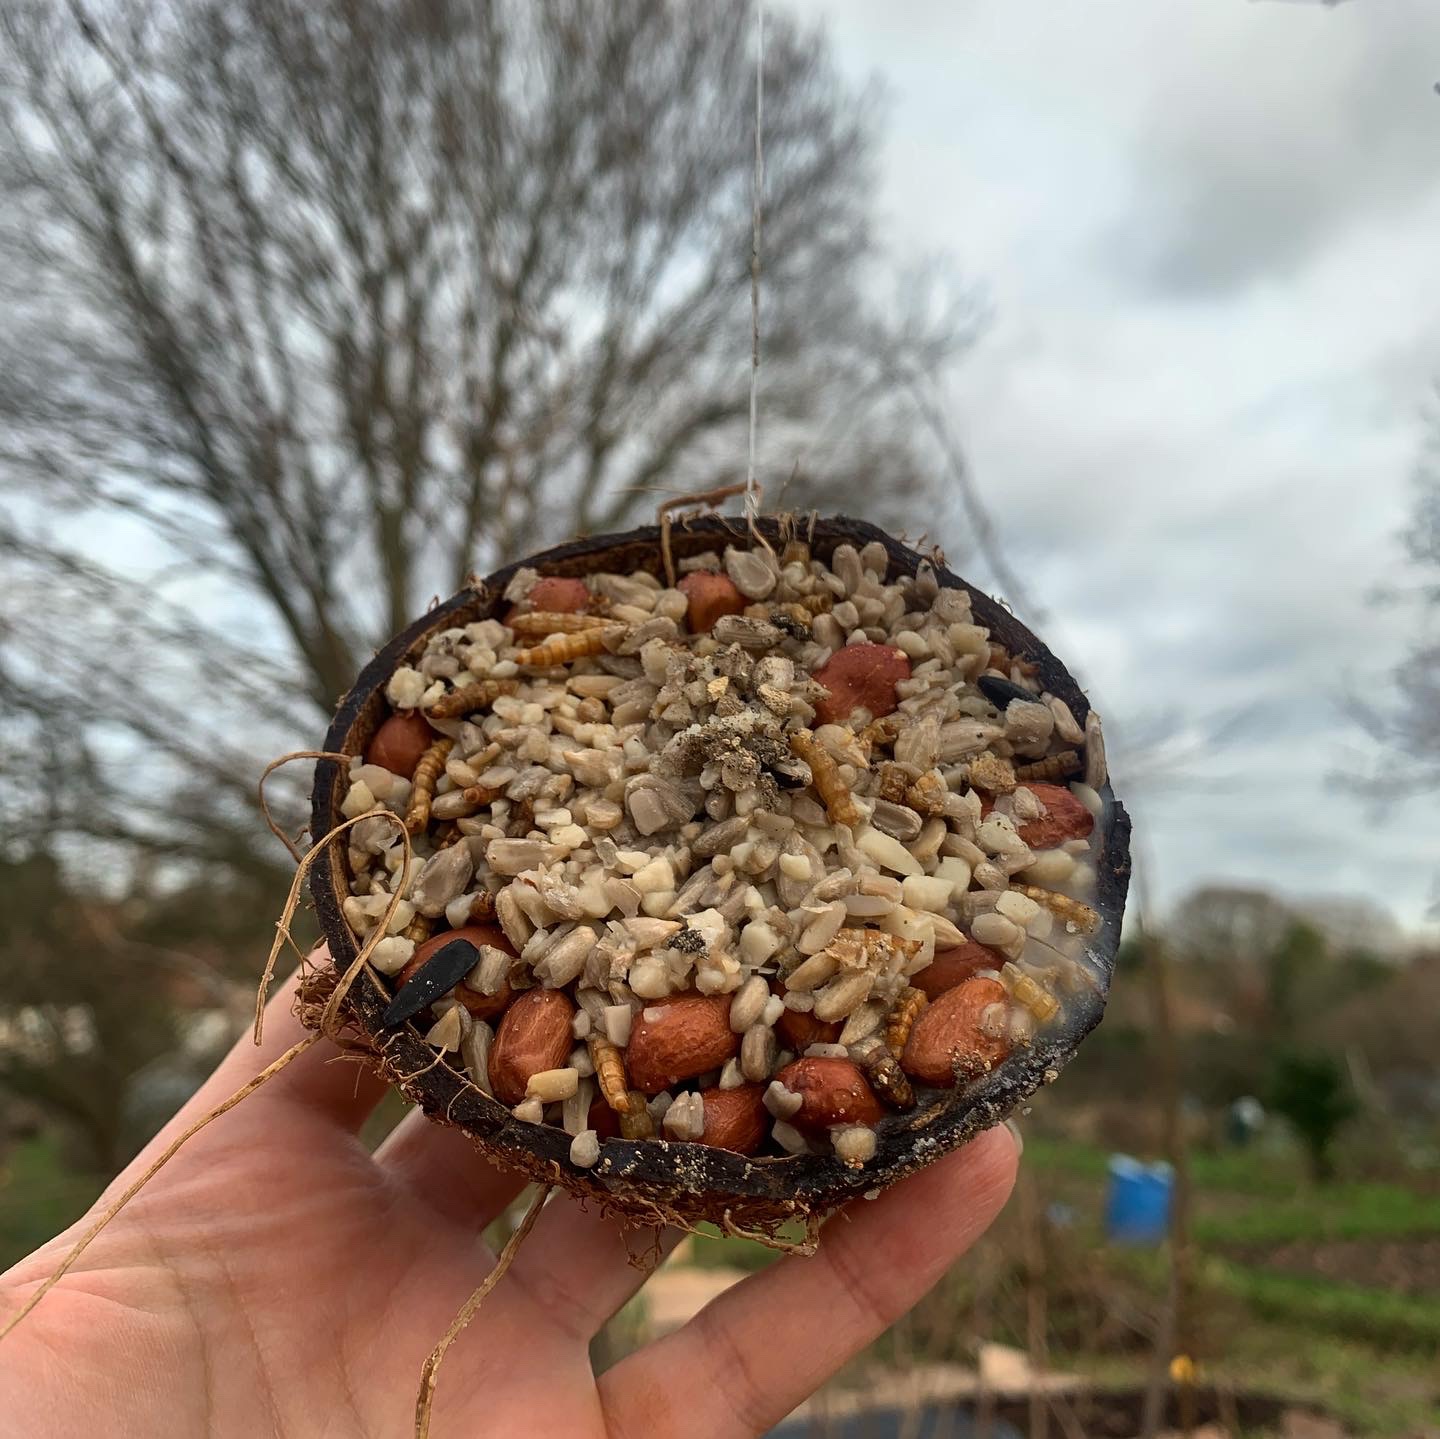
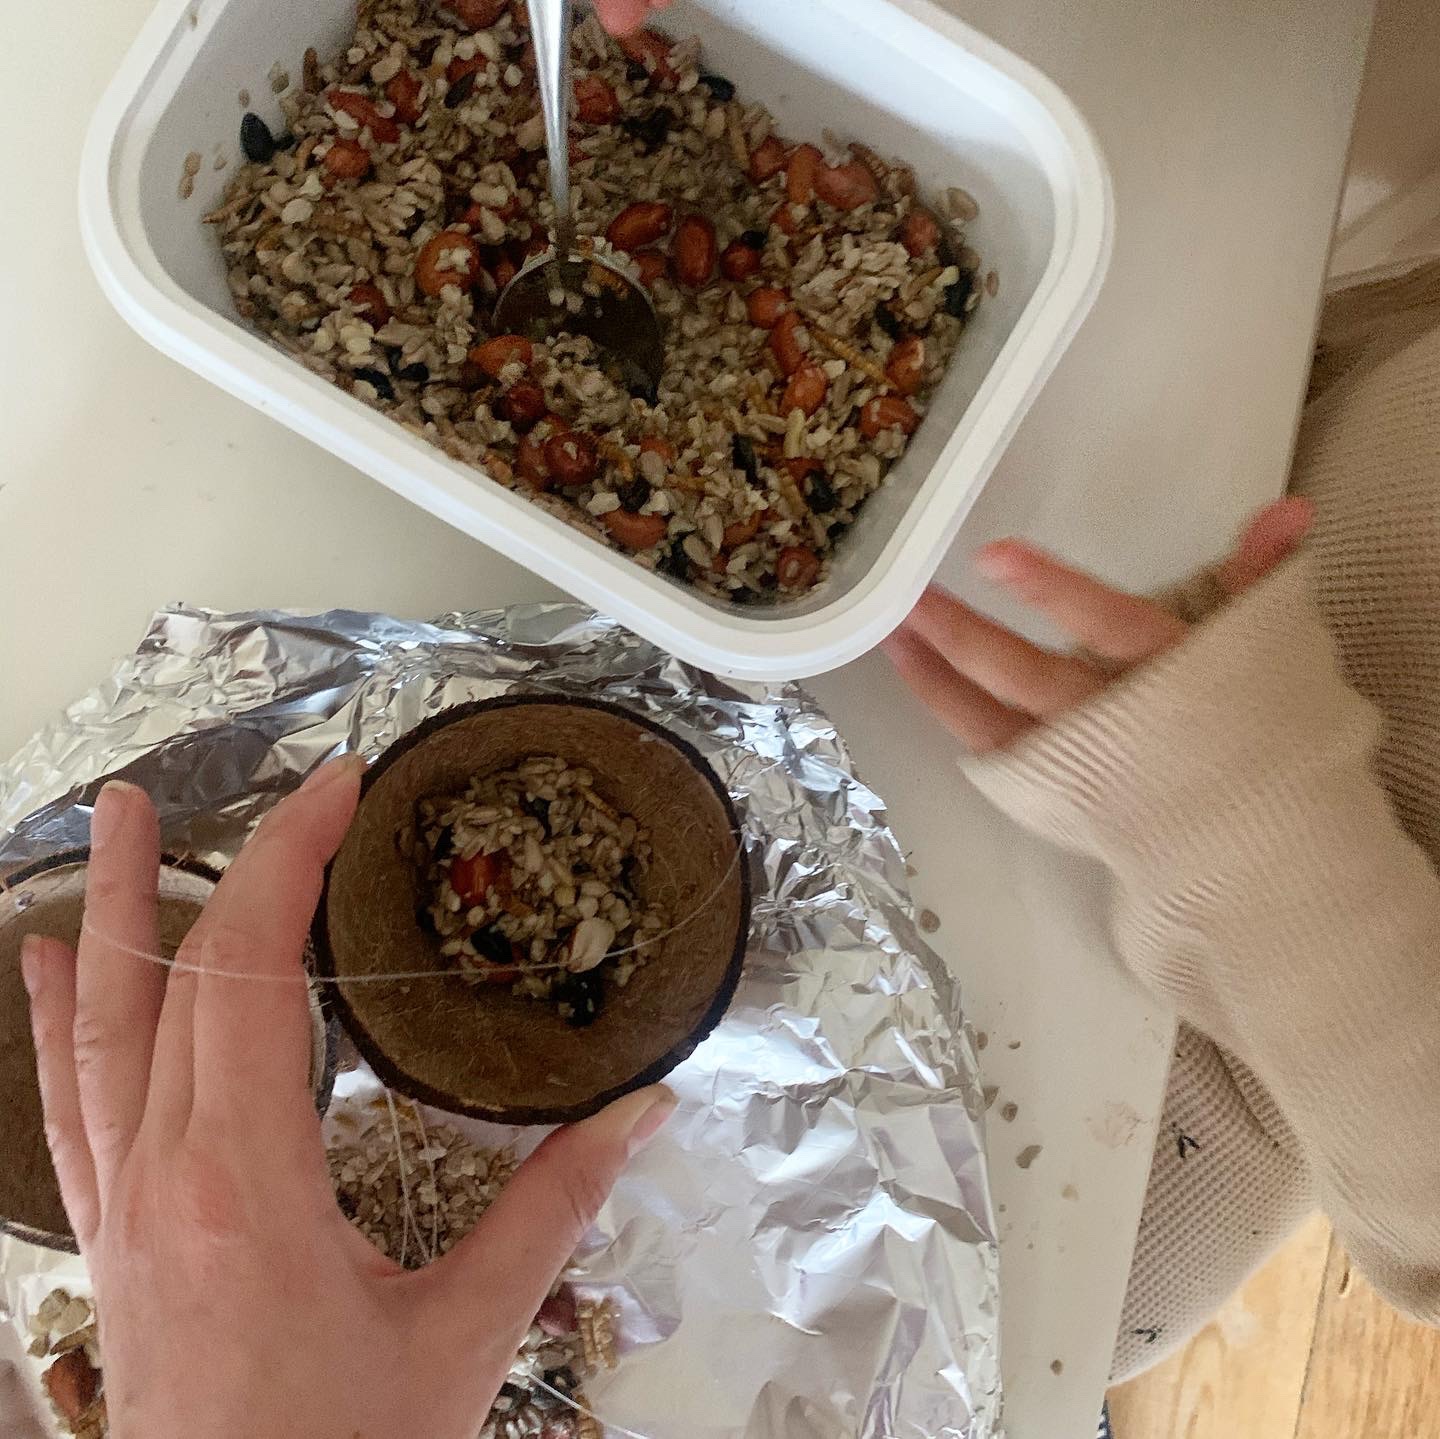
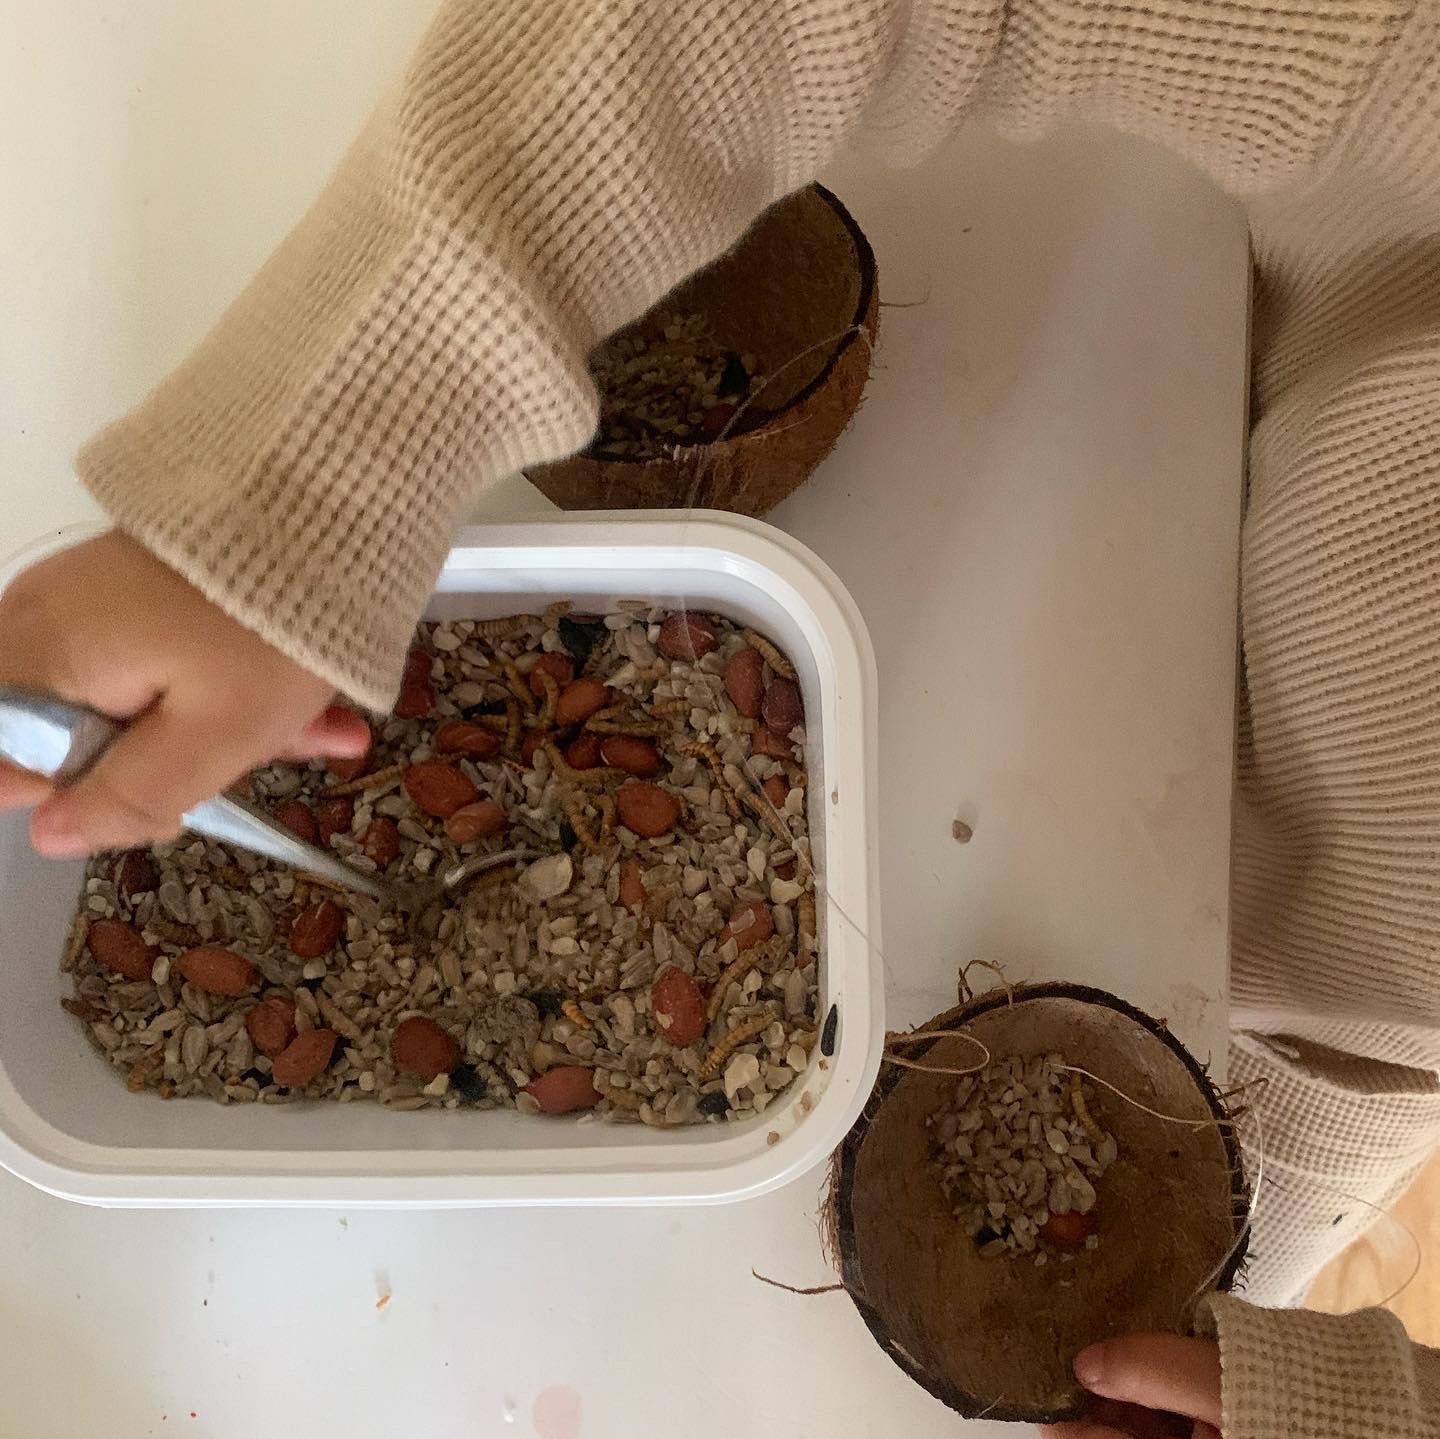
Your home– as mentioned, we throw so much away without second guessing or thinking what else we could possibly do with the ‘waste’ – try and repurpose as much as possible- wash bottles, containers and jars to use to store homemade chutneys/ sauces. Re-use pots from older plants. Broken terracotta pots? Break them up some more and use at the bottom of new pots to help with drainage etc. We even repurposed a coconut shell to make some bird feeders for the allotment – we got our newly turned 3 year old niece involved who loved it and the birds are definitely enjoying!
There is so much we can re-purpose when we put our minds to it and consciously think ‘what else can I do with this’ before it goes in the bin.
We would love to see your up-cycled creations and hear your ideas for up-cycling/reusing and less wasting, so please do write to us or tag us in your creations.
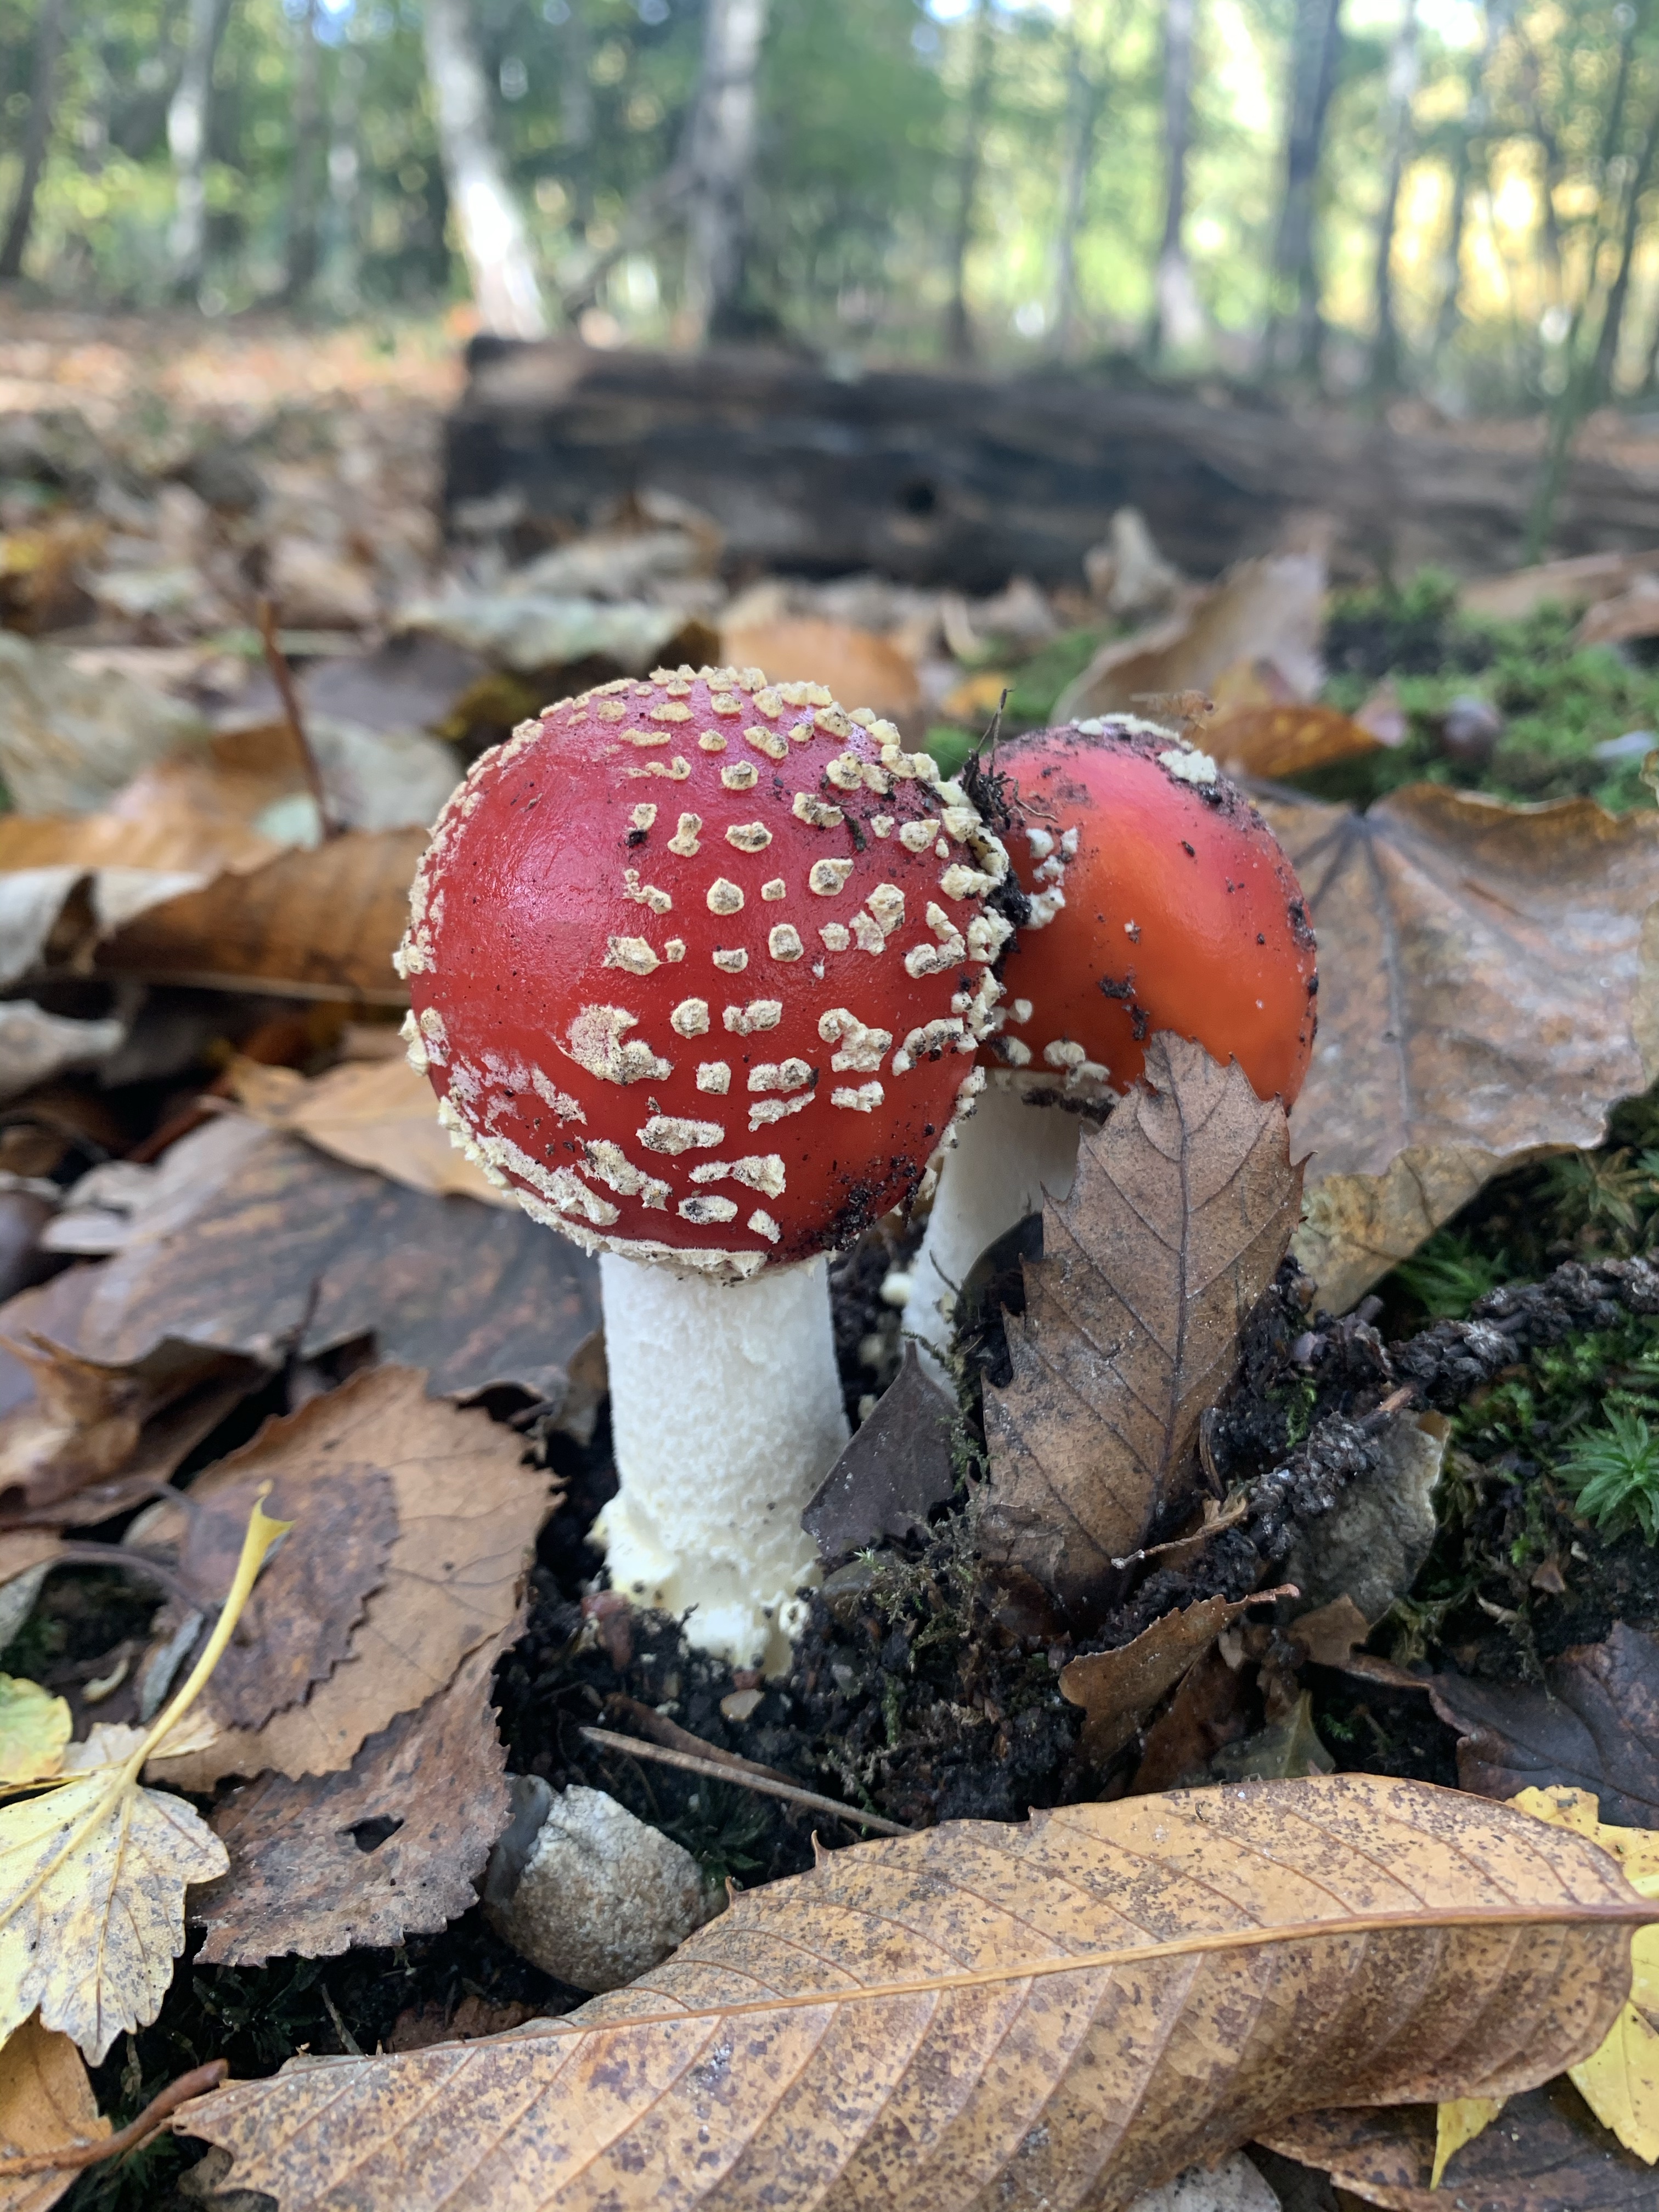
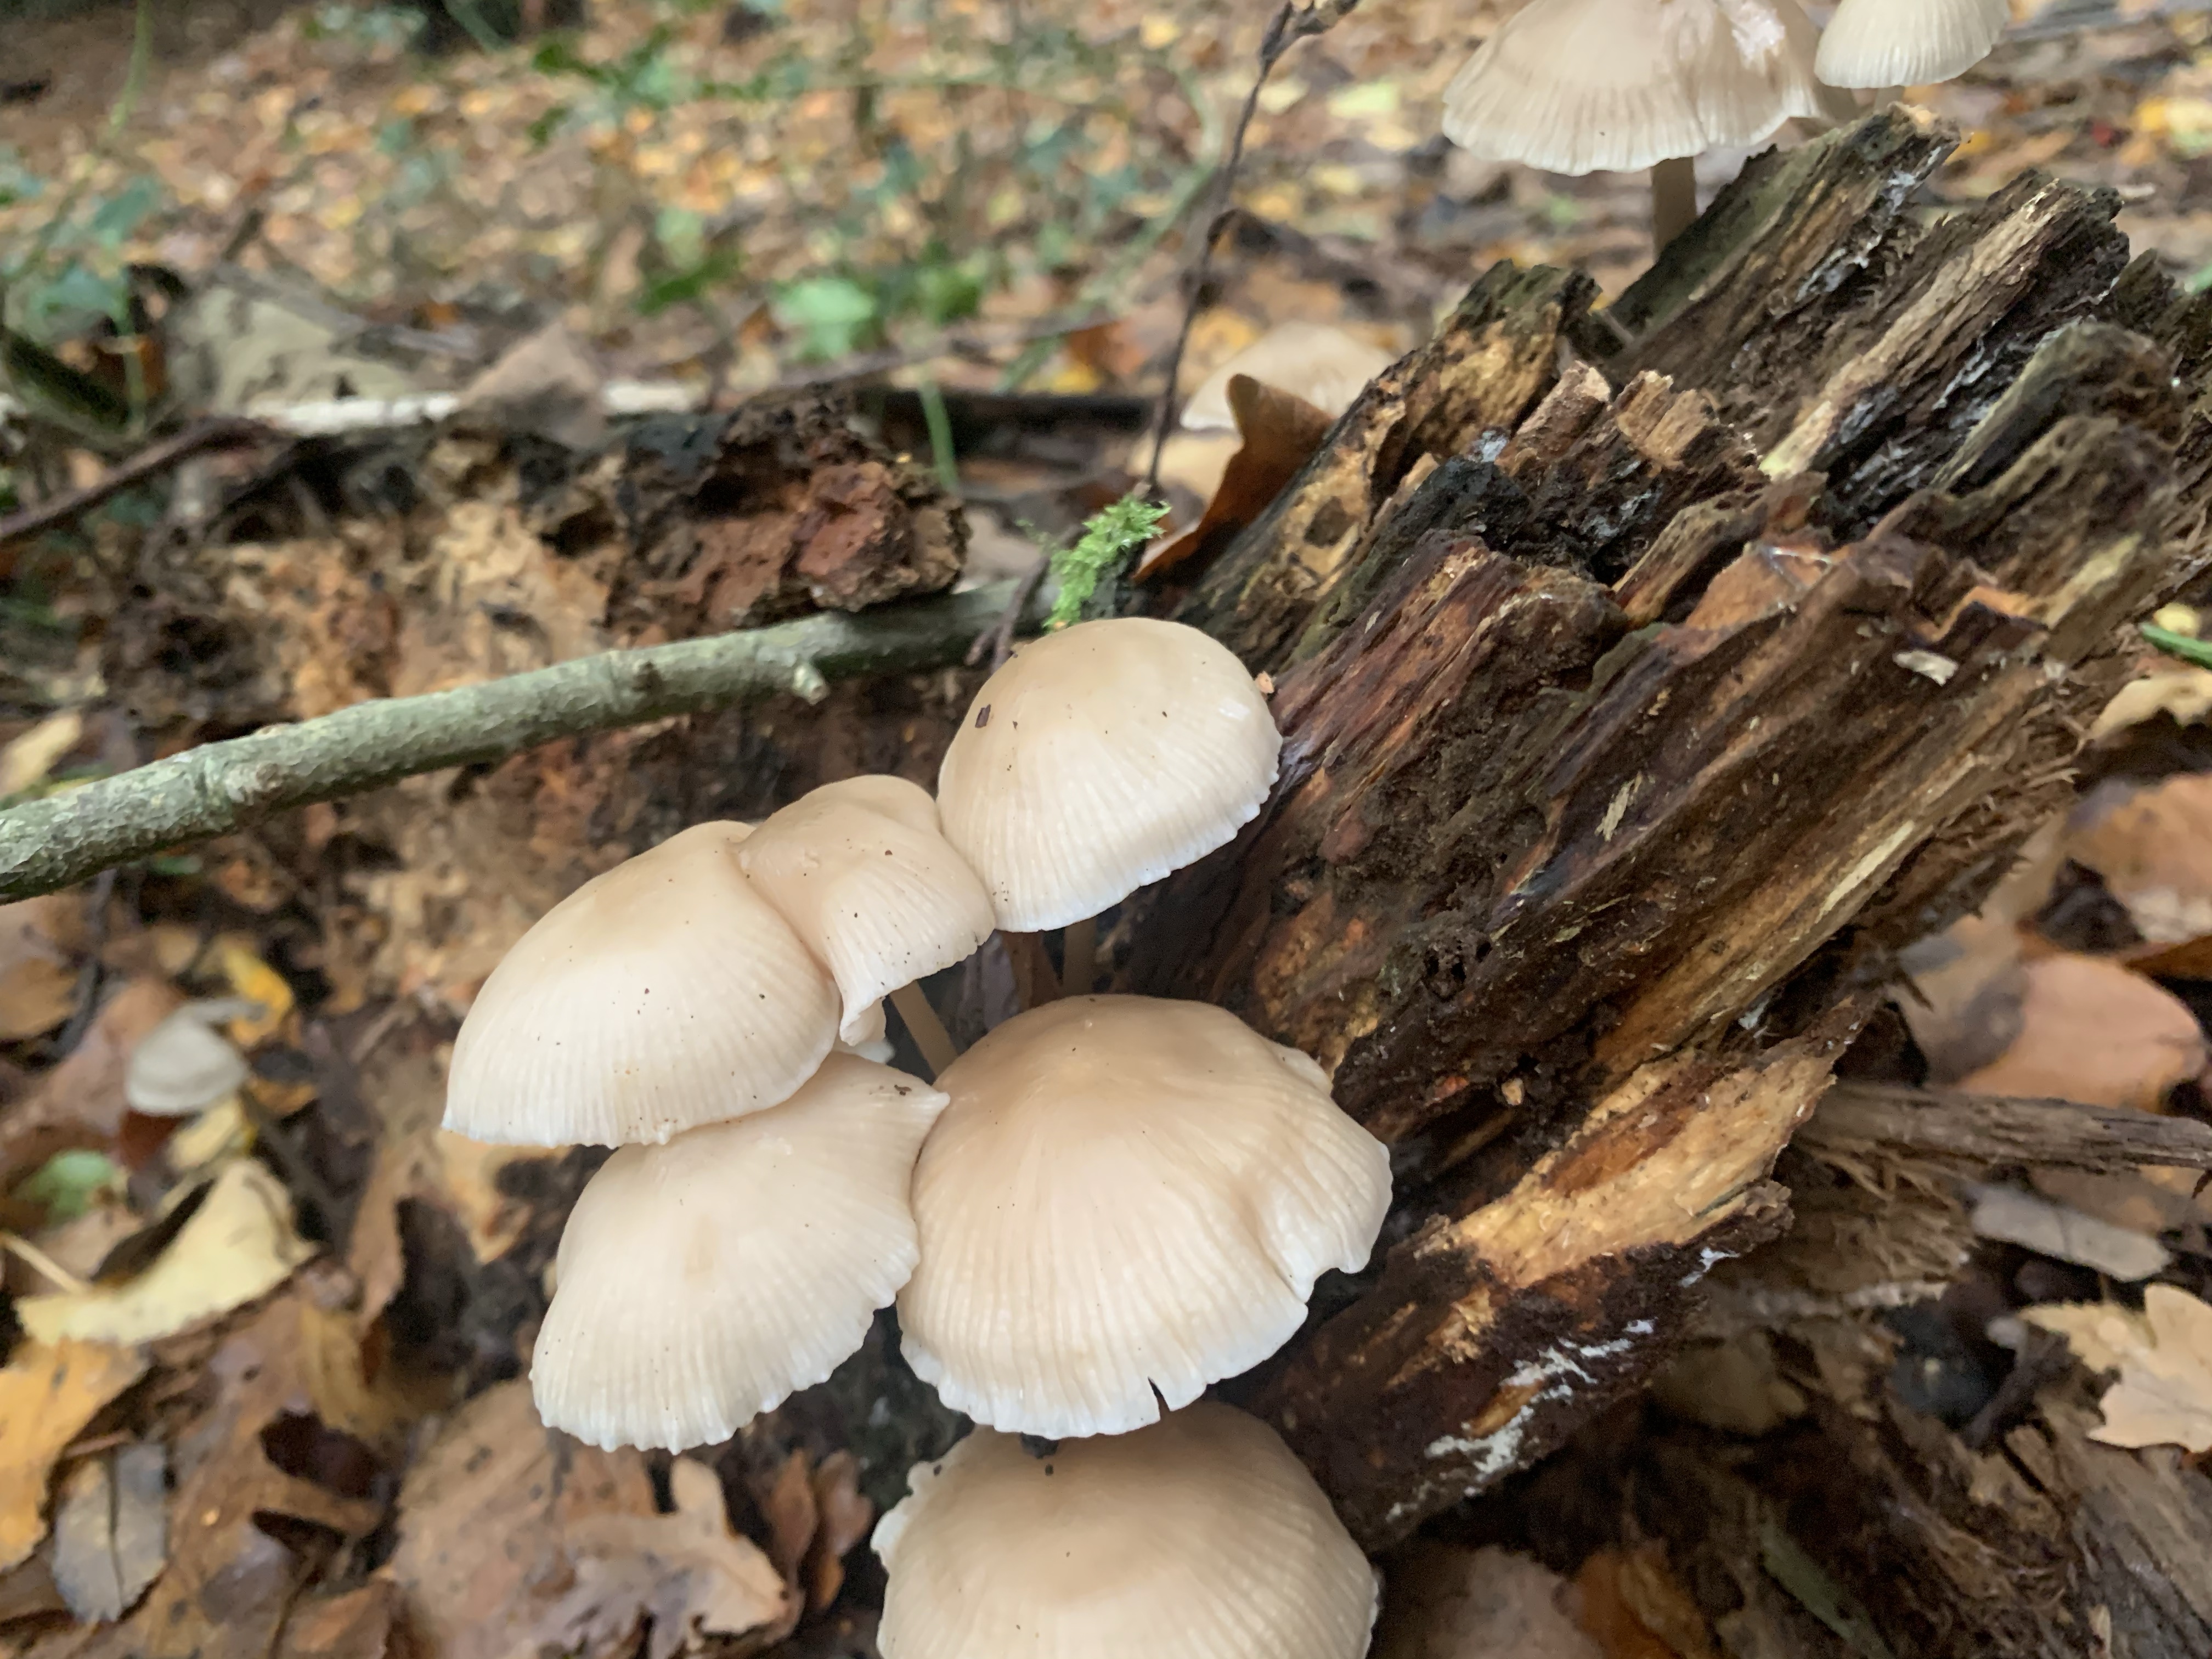
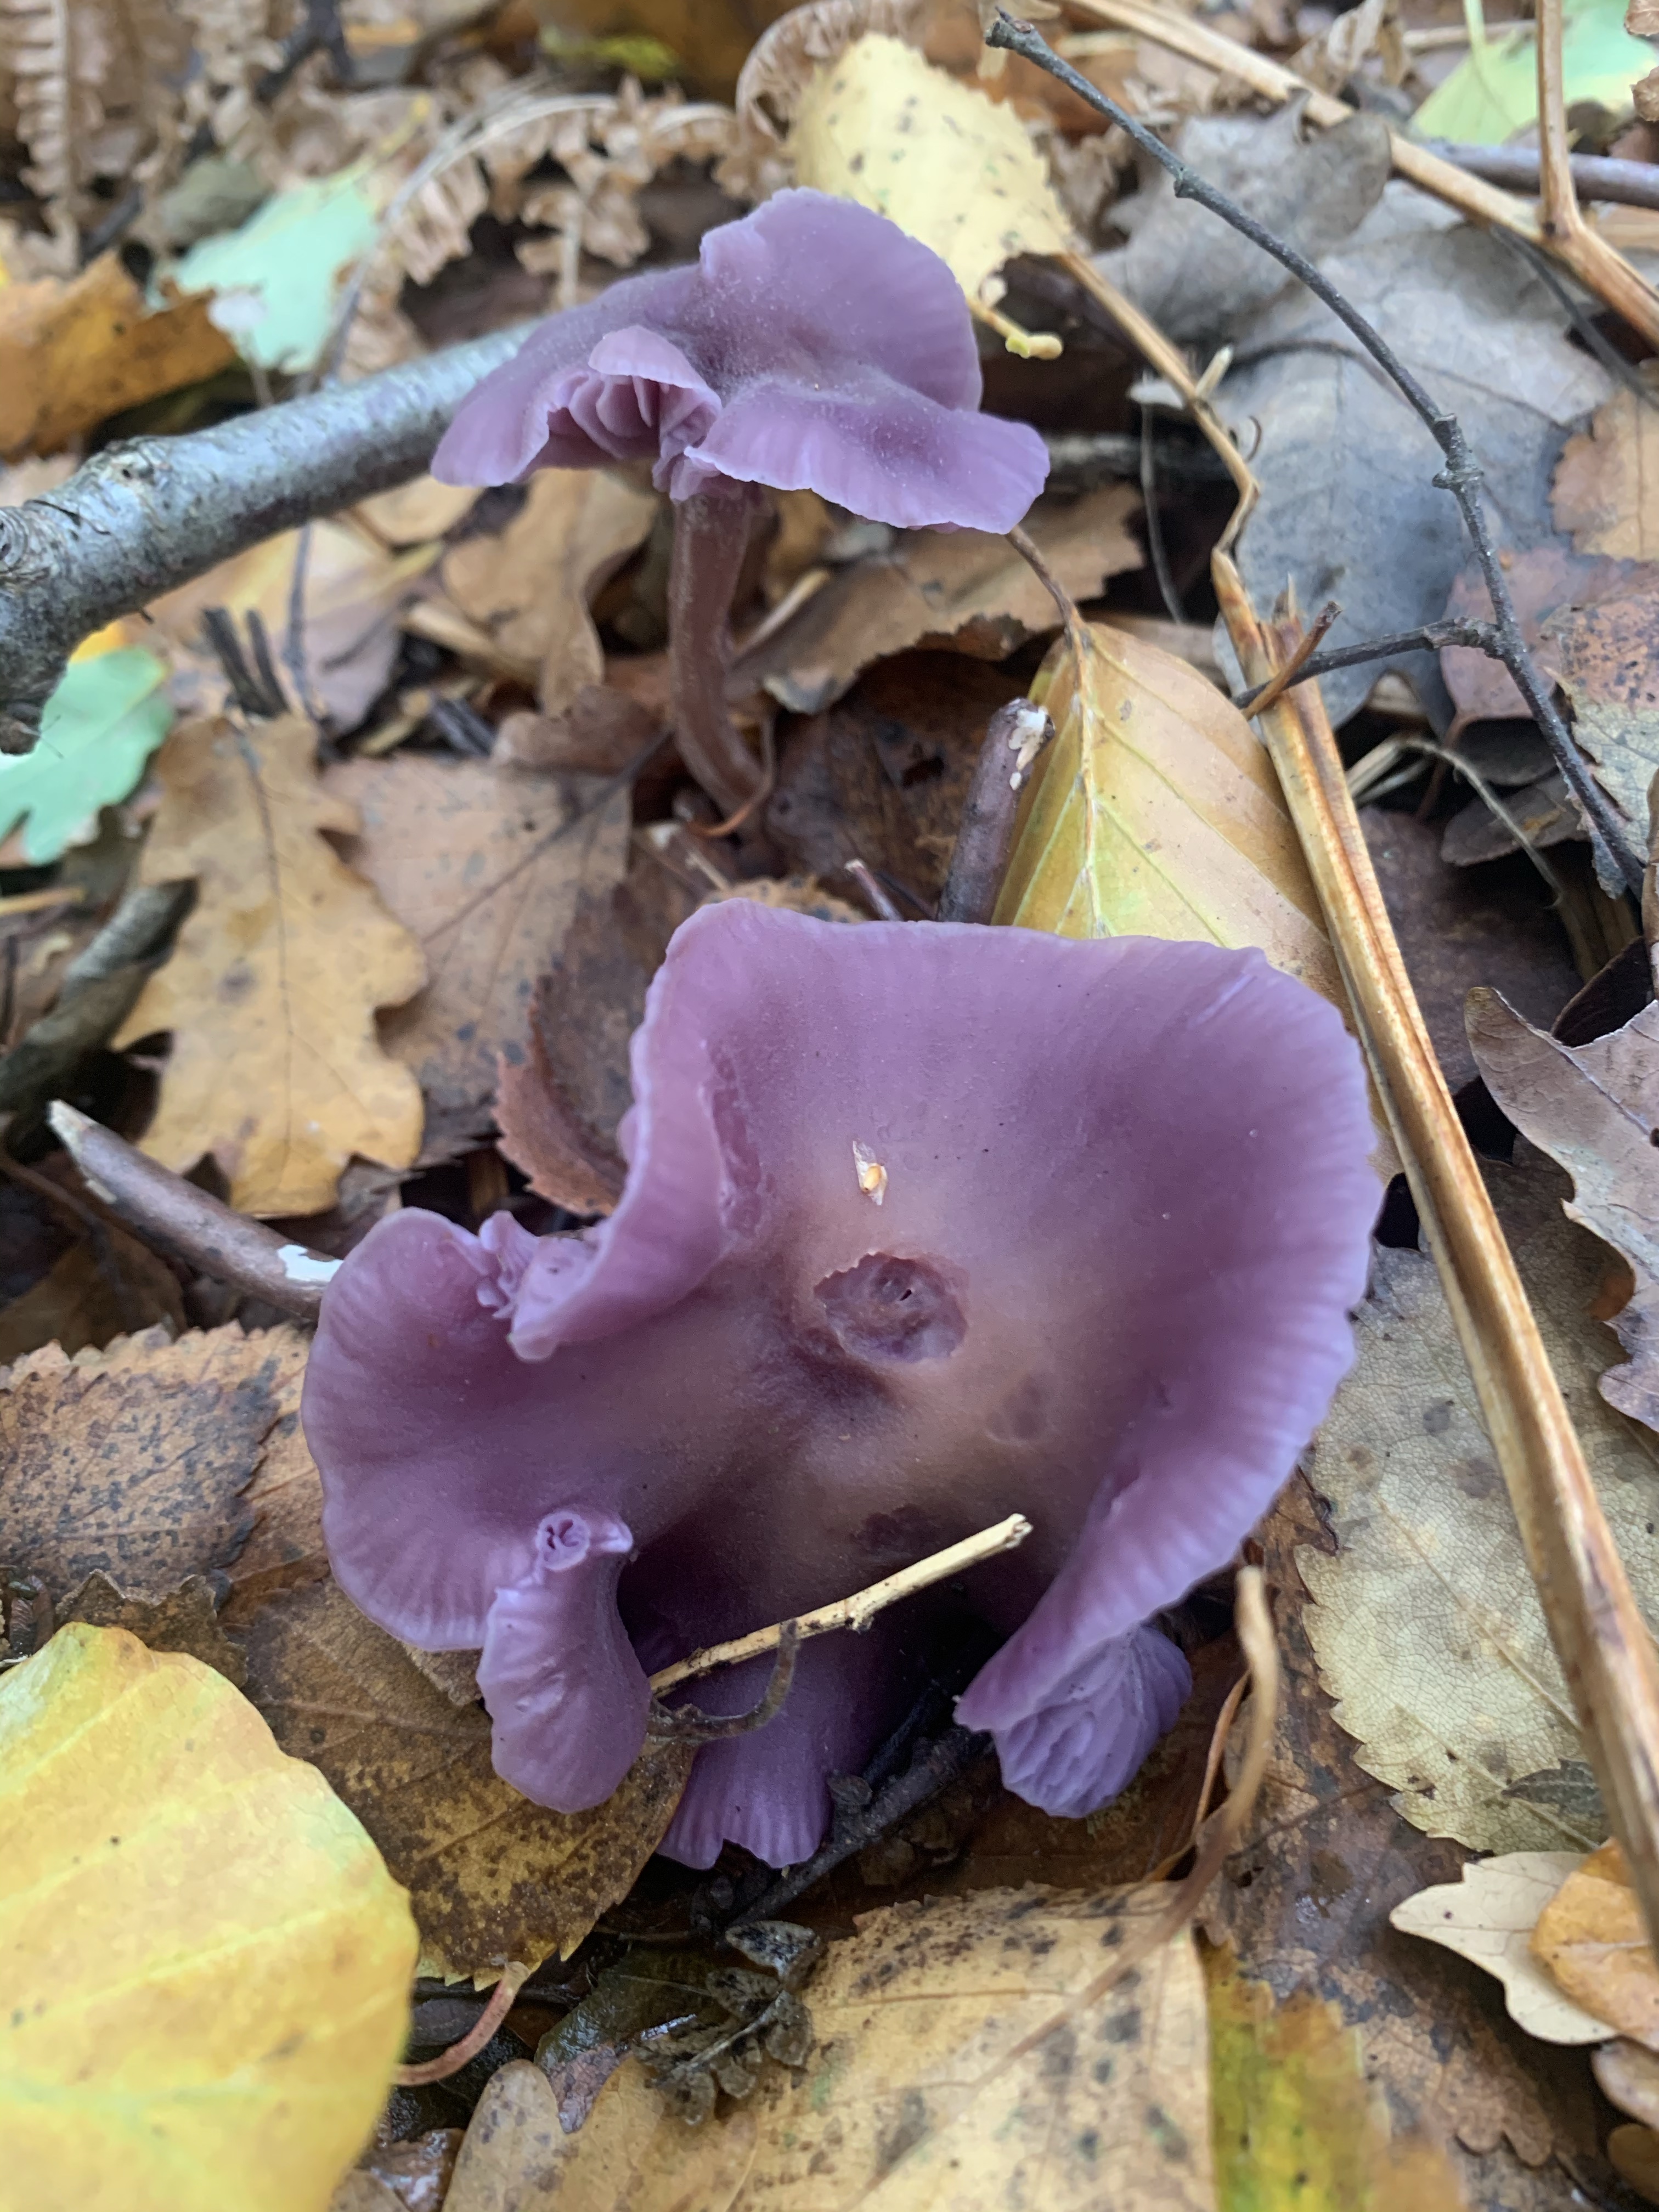
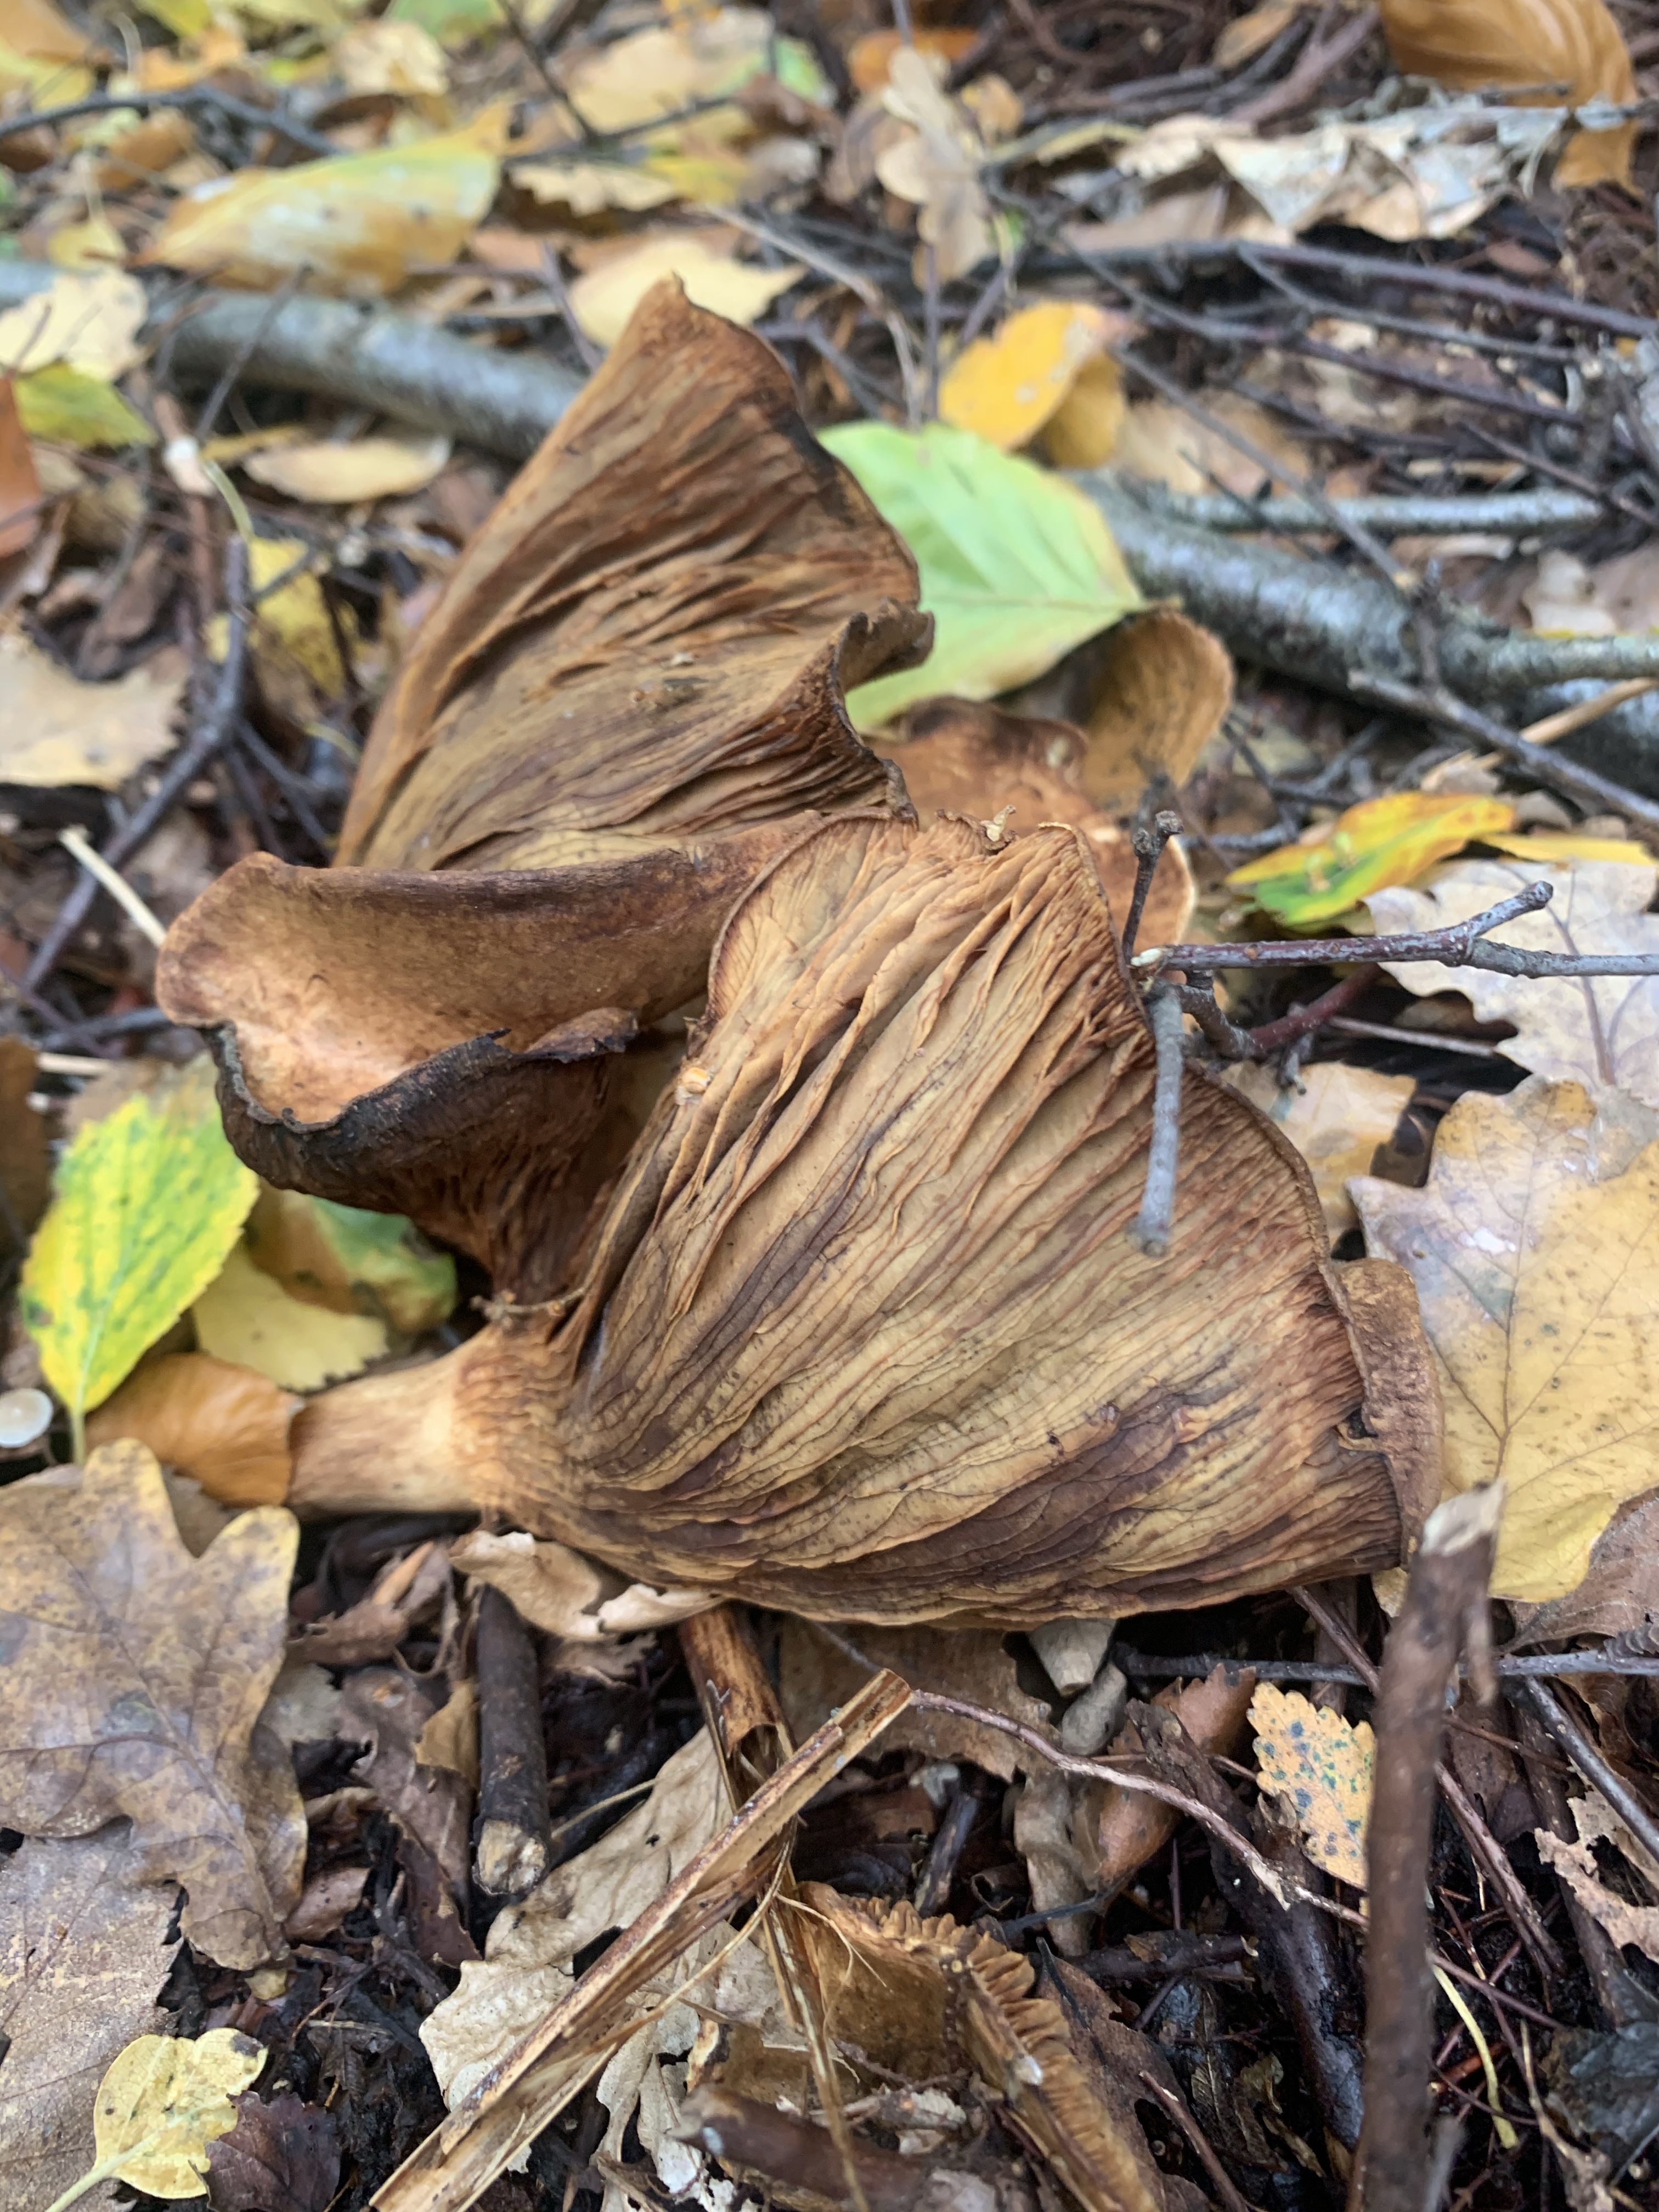
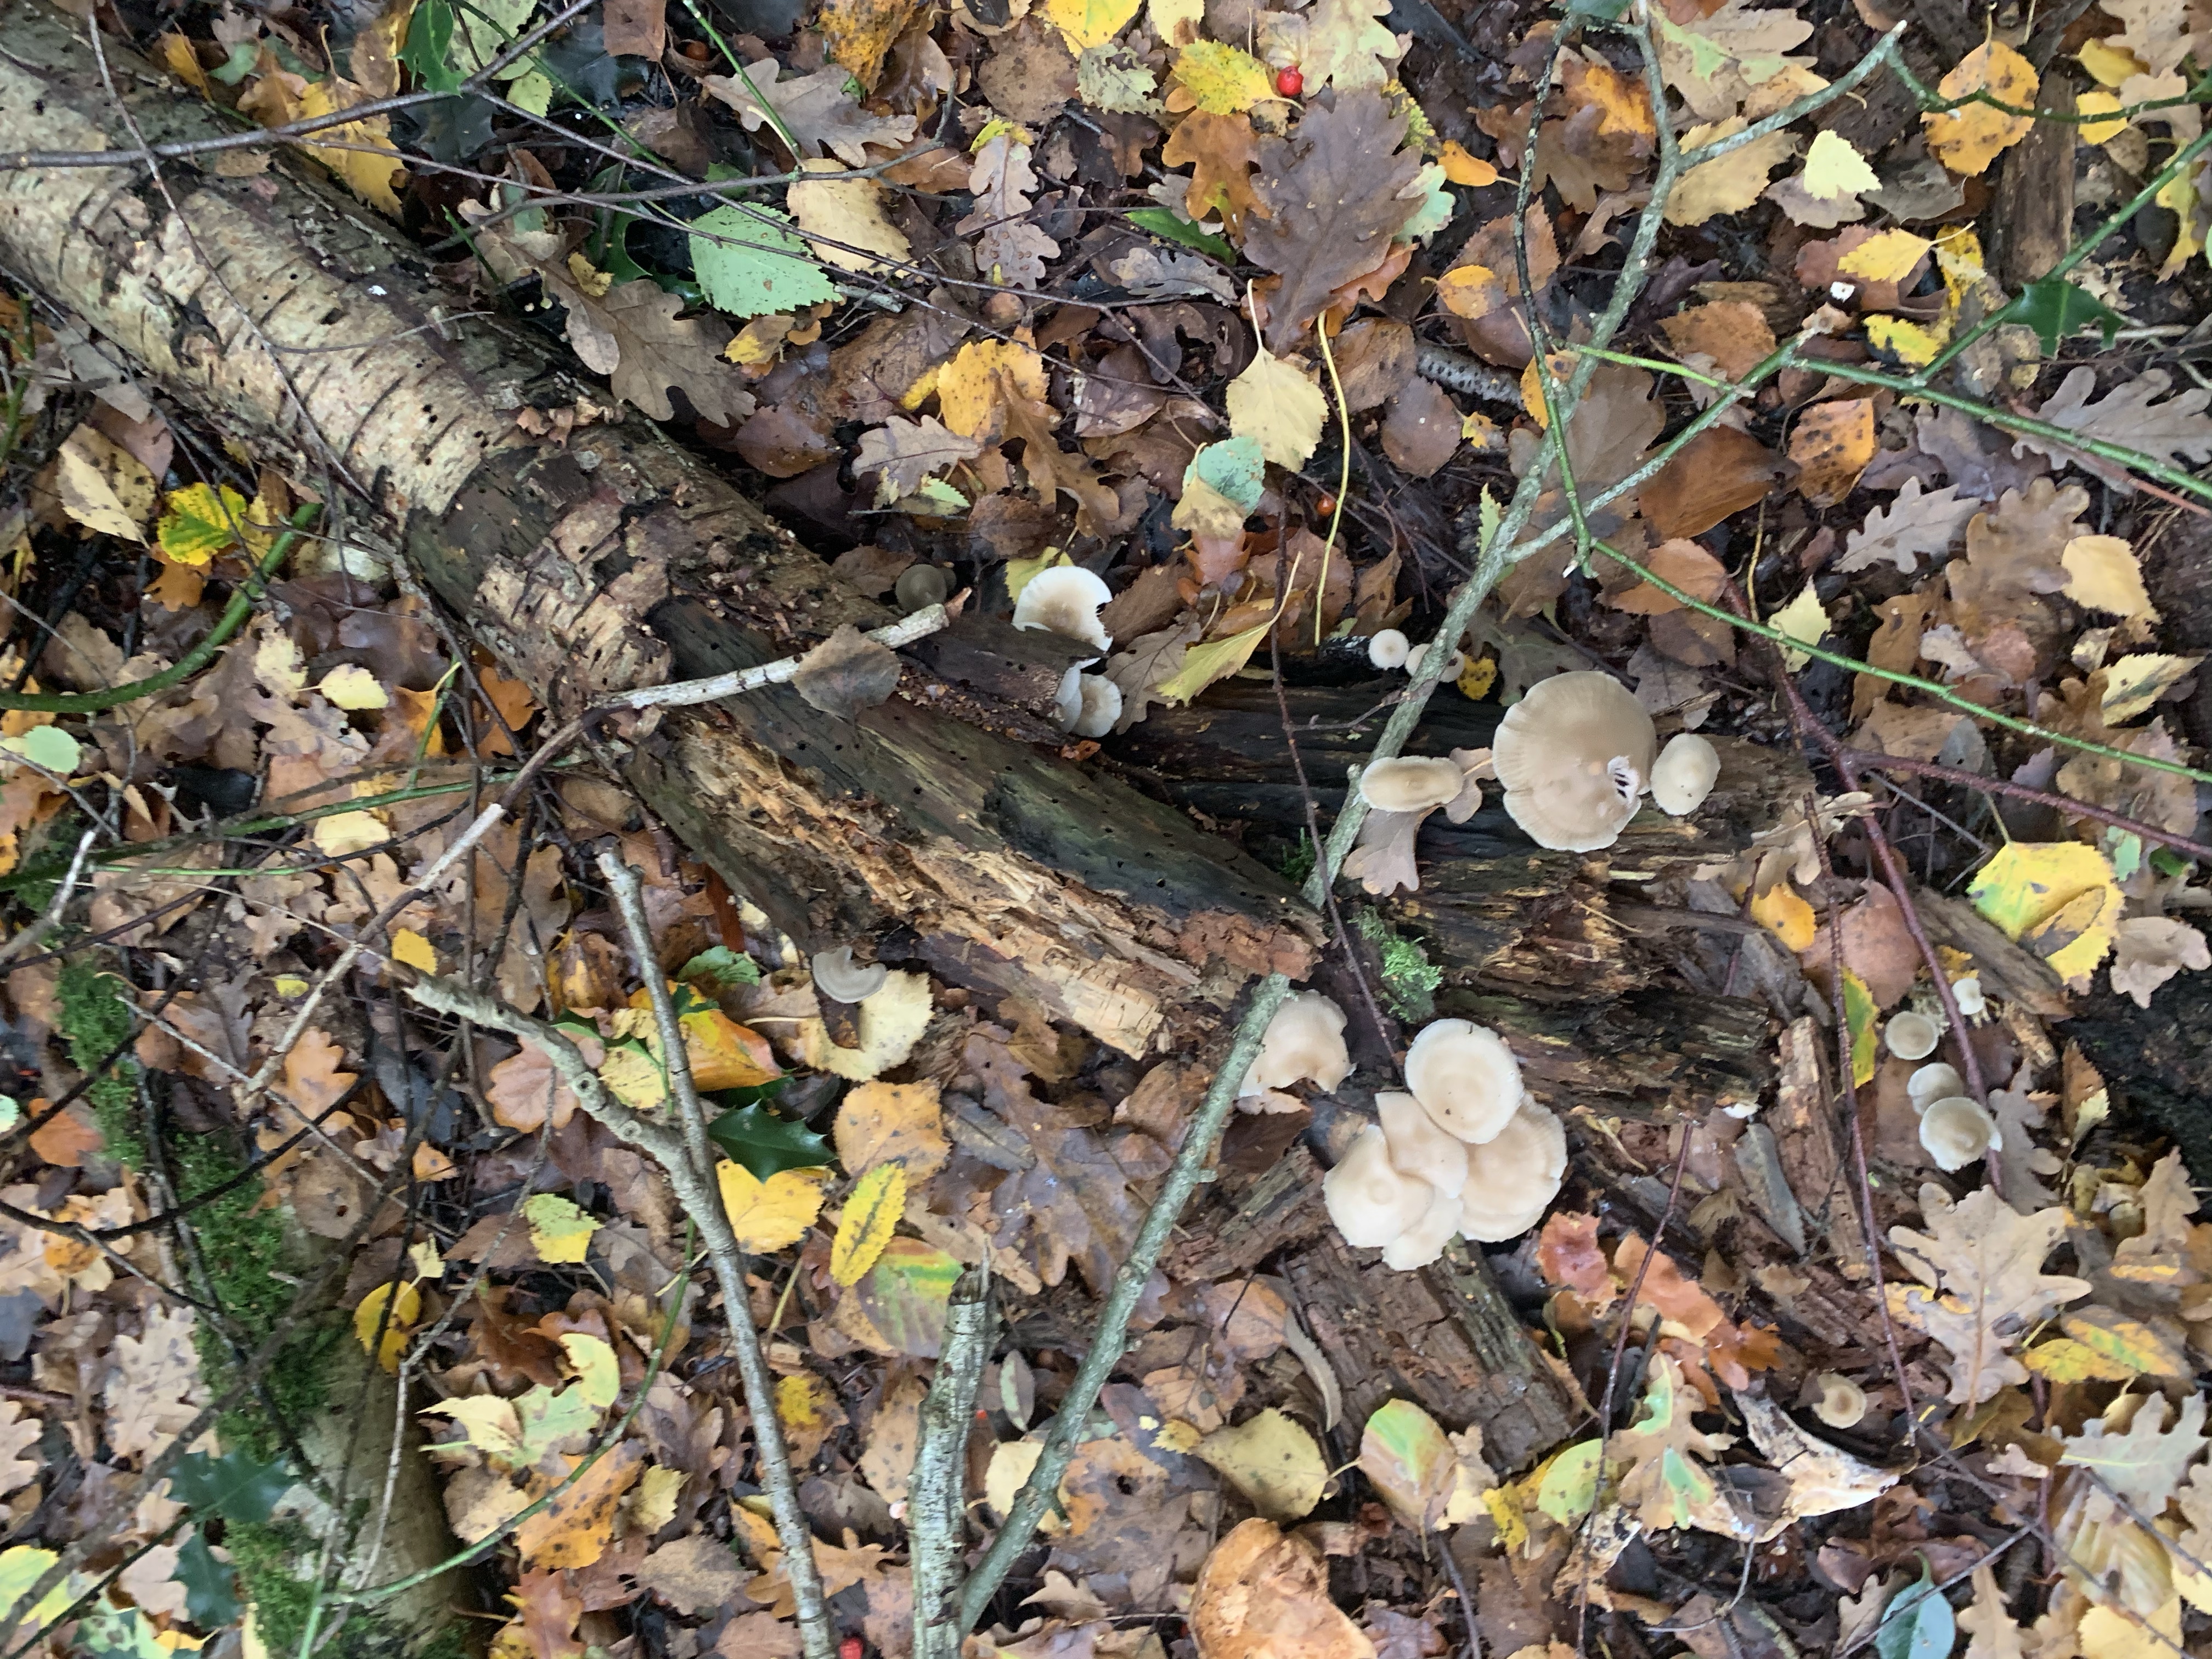
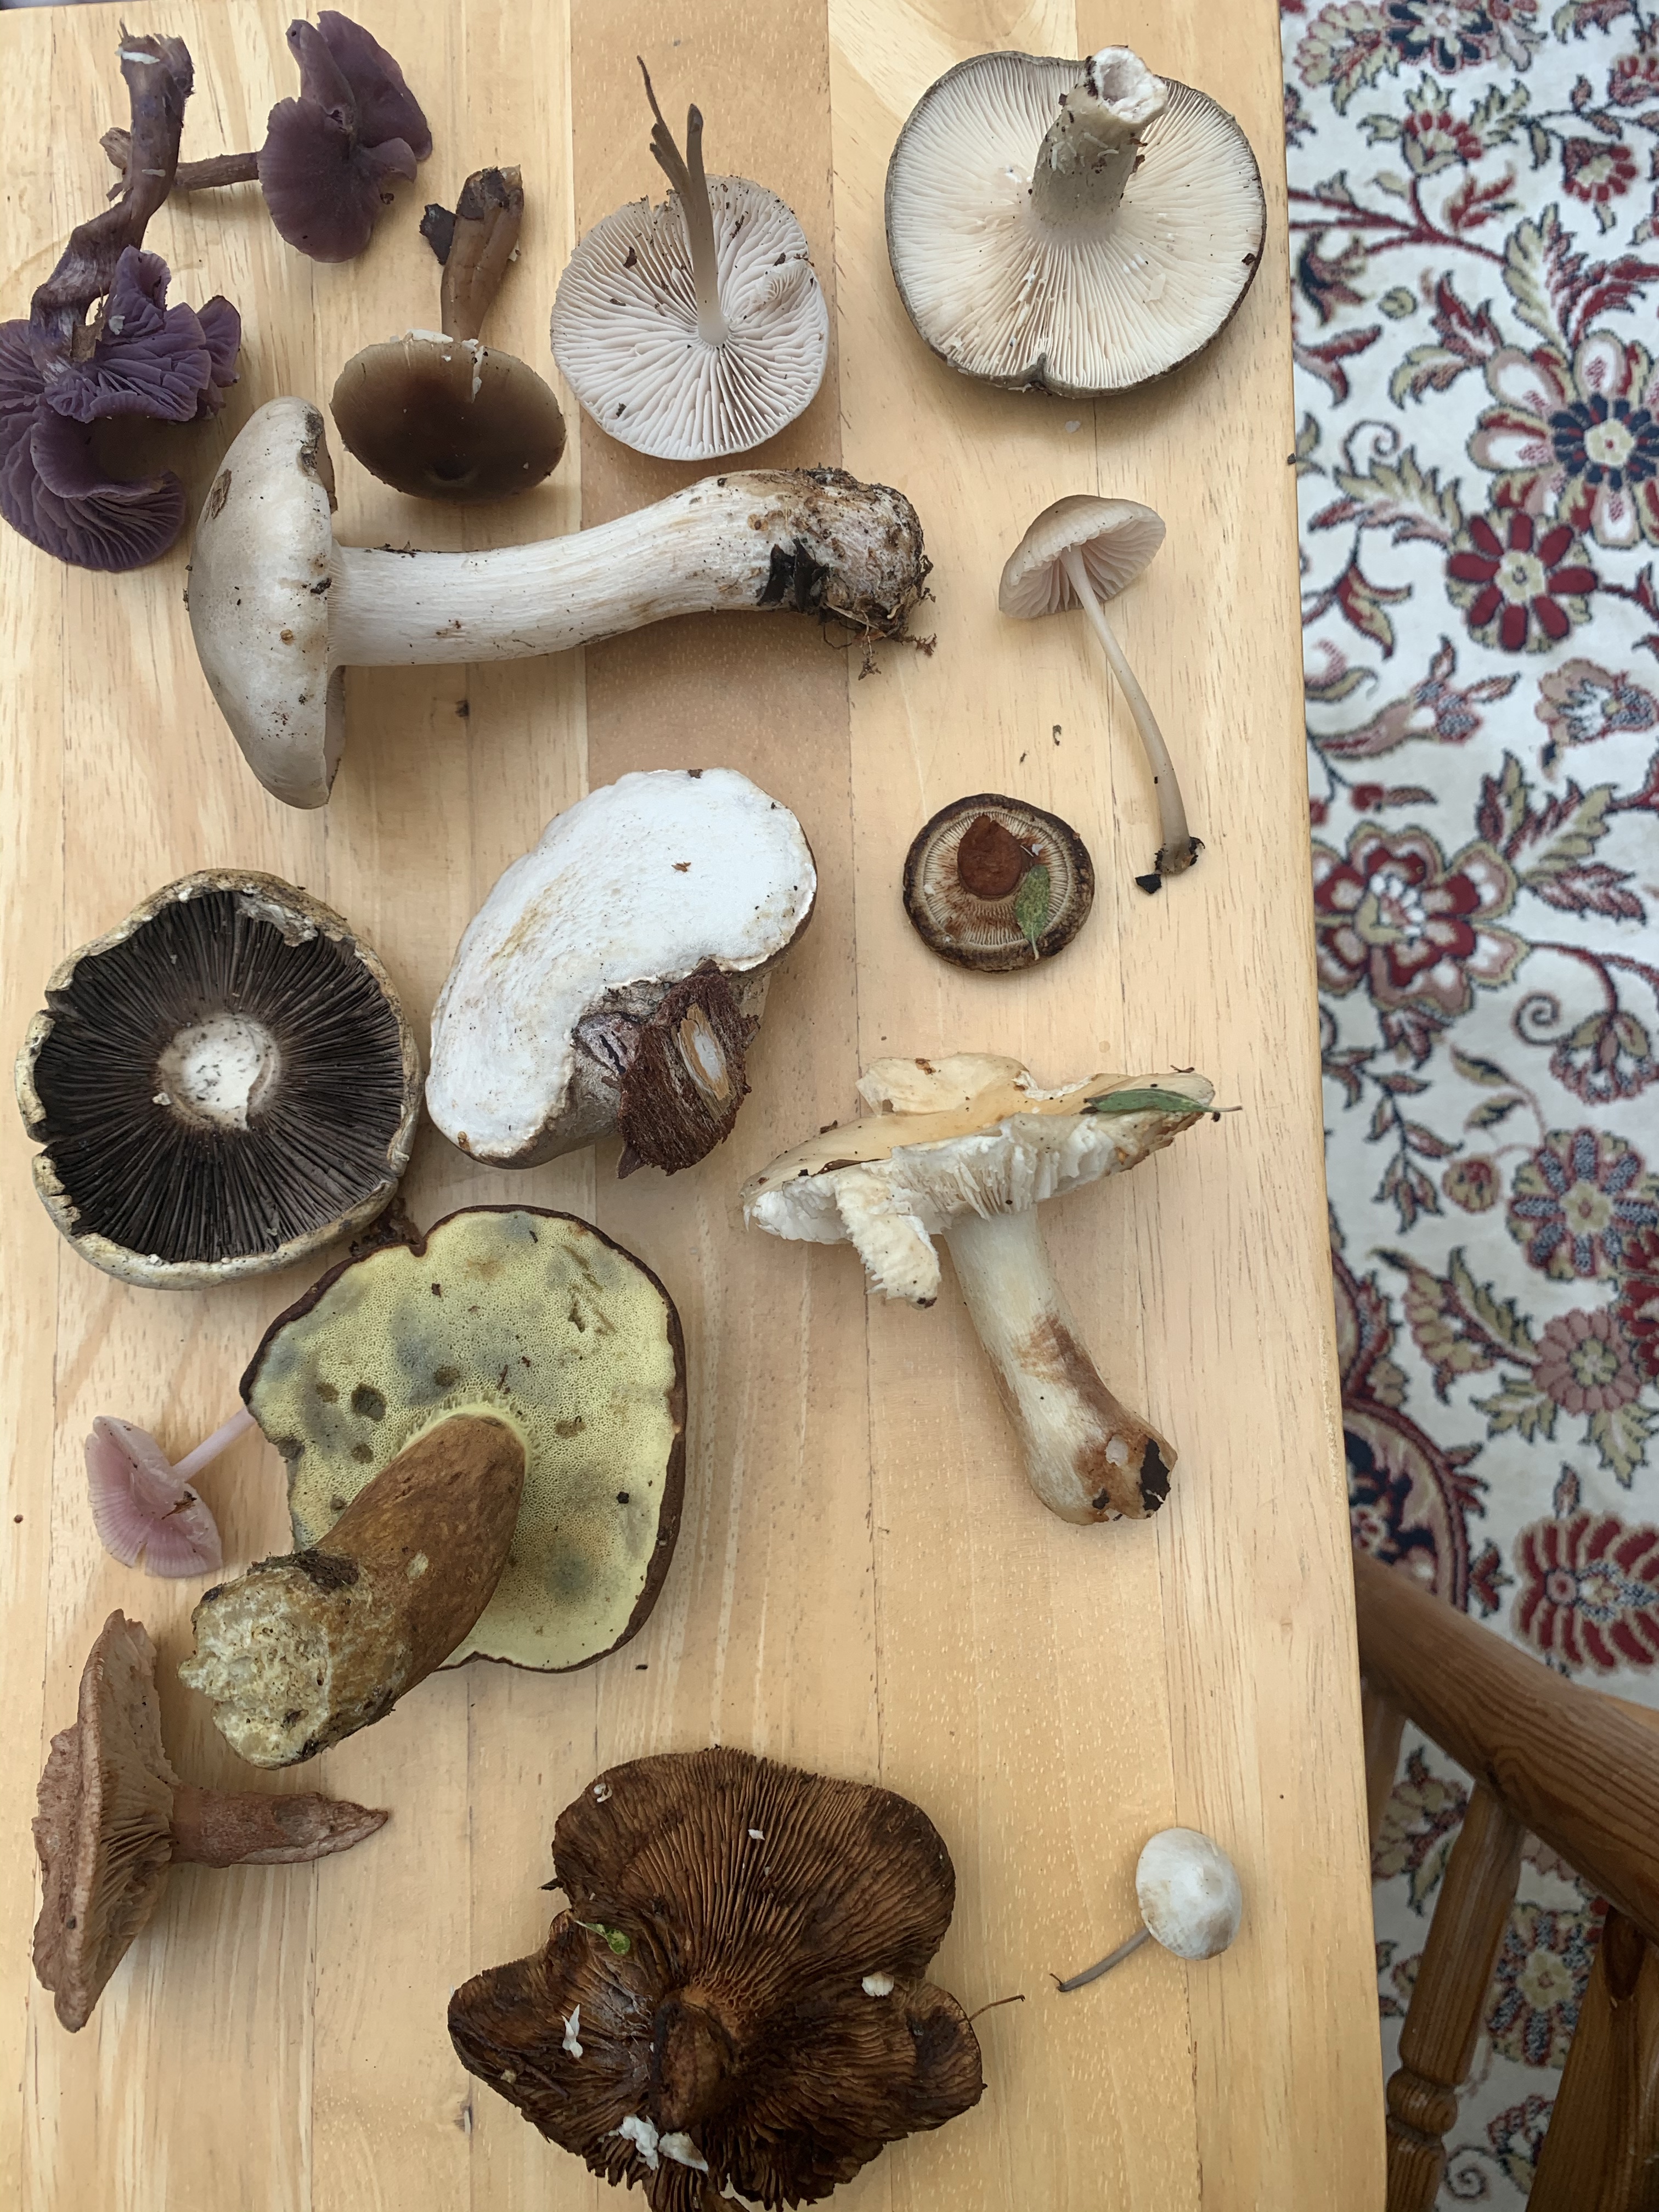
Wild mushrooms have always been fascinating. They are somewhat whimsical and conjure up a whirlwind of thoughts and nostalgic memories when I come across any. From Alice and Wonderland, fairy houses and my mother telling us not to touch the wild mushrooms because they could be poisonous and deadly.
The past few years I’ve always wanted to go on a true mushroom forage but have never had the opportunity to go with an actual mushroom forager- going to pick mushrooms alone and do a tasting session without properly identifying the ‘shrooms doesn’t seem like such a good idea…
BUT, this year, I thought I’d take myself on a journey through ‘magical mushroom terrain’ just to see what I could find in the woodlands near to where I live. I promised myself I wouldn’t eat anything, but did want to try and identify as much as I could and really start to get an understanding of what mushrooms are growing nearby / whether I could possibly eat any of them in the coming years…
The end of October is a great time for mushrooms here in the U.K..
One beautiful morning, late October I took myself out into the woodlands and began my search. I wanted to share the findings with you- who doesn’t like a bit of mushroom photography?! I want to encourage you to also do the same- explore, feel and smell. It’s one of the richest things for our bodies and minds to get out into nature, discover new things, feel the earth, connect with the trees and breathe that fresh oxygen into our lungs.
If anyone knows of a mushroom forager in London or Kent, I’d love a recommendation. Otherwise – please enjoy the photos. I’ve decided not to name any of the images (in case I get the identification wrong) but as an overview- I came across some fly agaric, butter bolete, amethyst deceiver and birch polypore.
ENJOY!
Wild U.K. Mushrooms
D.O.A.N.G
If you’d like to see our frequent updates on how the garden and allotments are coming along, please feel free to follow our Facebook / Instagram pages in the links below: