So, for my birthday (2019), my Mrs brought me a wormery – true love that is. The kit came (again thank you my amazon account) from a UK company and was very easy to put together.
I have started one tray and the worms live near the house (at the back door) for any green waste to be thrown in regularly.
To start, assemble the kit as per instructions or DIY yourself some form of box with a drainage hole at the bottom. Cover the drainage hole with some gauze and keep on the slant so any wormy juice can run off (remember to collect this). Worms do not like it too wet…and if it gets cold, they may freeze so I advise some form of lid to your worm box as well. Keeping worms is the simplest of tasks.
To start, obviously obtain/order your worms, (I believe I have a Tiger worm variety), do not spend ages finding garden earthworms. These are not composting worms as they live too deep in the soil and are generally too inefficient – just get some proper composting worms, trust me on this…they are not very expensive and once installed they will just keep going and breeding merrily.
Secondly, use some damp newspaper at the bottom and add some garden soil and compost.
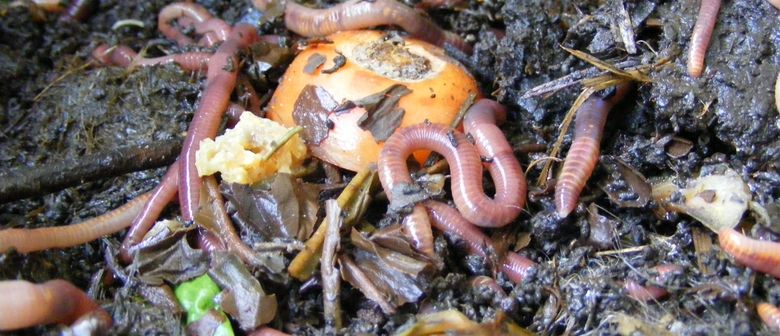
My kit came with a Coir briquette, which is fabulous. Add worms and cover with around 3 inches of wet shredded paper on top. Give them a light feed (worm dust) or some minced up vegetables and crushed egg shells (we will do a post on why you should be microwaving / cooking egg shells before use soon).
Every night, for the first few days/week you need to keep coming out in the evening [and I was using my phone torch] to shine a light on the worms. They will be exploring their new home and trying to escape. Worms are photosensitive which means they do not like light so will instinctively head underground/under cover to shy away from your light.
After about a week, the worms were used to their new home and stopped trying to escape. So from now on, any vegetable ends which is not being composted can be thrown into the worm bins.
I do not own a dog, but apparently it is okay to add dogo or cat ‘presents’ into the wormery – personally, I wouldn’t if you are going to use the vermicompost on your vegetables. In addition, apparently it is okay to add small levels of meat into the wormery – again I haven’t personally as although I do not own a dog, there are lots of foxes and cats in my area whom I do not want breaking into my worms.
After a few months, you will be able to harvest some worm tea from your wormery. Just use this as you would any liquid feed by diluting it at a 20:1 ratio and add it to any plants you wish. If you have not received any tea you can ‘flush’ the system by pouring in water – but you risk drowning your worms if this does not drain well enough.
If you are using a tray system, after your first tray is filled, add the second tray and feed into the second tray – theoretically worms should move up to the next tray following the food – although I find they tend to not bother much…after sometime this will allow you to harvest the first tray for the vermicompost.
If you are not using a tray system, simply only feed the worms on one side of your wormery. Again, the worms should gravitate to the food allowing you to harvest the opposite side.
To harvest, I tend to break up the vermicompost into piles and shine a light on it, the worms retreat to the bottom of the pile and I can remove the top section. Reducing the size of the pile, bit by bit, until all that is left are the worms. These I add back into the wormery – this is fairly time consuming to do but it does mean that no worms escape the wormery and I can store the vermicompost without killing any worms to dry it out. If you do not care simply, try to dry and sieve the vermicompost into bins or bags. A few worms will be lost but they replenish very fast.
You may also see a number of small yellow eggs in your vermicompost – these will hatch into new worms when you add it. I like to keep my vermicompost to dry out before I add this to the garden but there is no real need to do this – you can add the vermicompost as an addition during the growing season around plants or into the top layer when preparing beds.
Here are a few other alternatives / options [should you decide a wormery is the missing addition to your garden!]:
https://www.originalorganics.co.uk/the-tiger-wormery-4361
Enjoy!
D.O.A.N.G

Interesting story . When I moved into my house, I wanted to start a garden. I collected any kind of plant material I could including broken bags of mulch and pine chips from the local Garden Big Box store. To get worms in my soil I went to Walmart and for about three dollars got a small container of fishing worms and put them into my soil.now there are hundreds of worms in the garden when I dig it up. Have fun gardening.
LikeLike
I don’t like worms at all, do not like the way they move. I could however use one of these as I have recently began recycling my leftovers.
LikeLiked by 1 person
Oh gosh nor do I! My brother and sister used to actually chase me around the garden with them! Would definitely recommend one though! Great device and great compost for flowers and veg!
LikeLiked by 1 person
OMG!!!! Is it working!? Let us know!
LikeLiked by 1 person
Yes!! Fully recommend a little wormery if you have space! Wonderful compost and worm ‘tea’ for all the plants, fruit and veggies!
LikeLike